コピペで学ぶ、GitとGitHub入門
https://note.com/nahito/n/nded6e4dd7382
購入物は、「2020年08月07日 17時37分 のメール本体」 の中に入っている
============ 以下、自分で試してみたこと =================
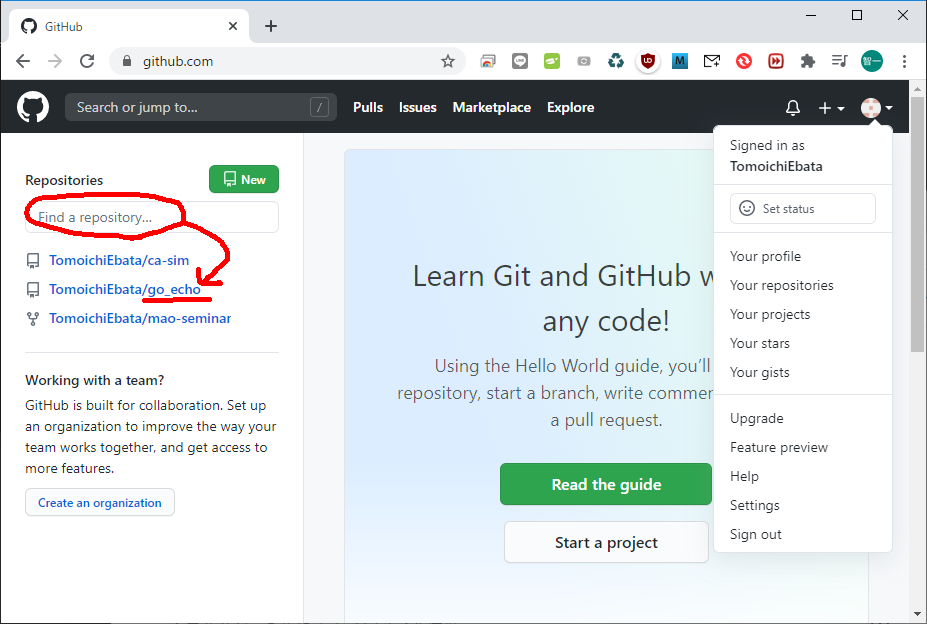
(Step1) github.comからリポジトリ(go_echo)を作る
(Step2) ローカルのディレクトリ(どこでもいいが、例えば、~/go_echoなら、そこ)にcdする
(準備)
>git config --global user.name
でユーザ名を確認。違ったユーザ名なら、
>git config --global user.name "正しいユーザ名"
>git config --global user.email "正しいメールアドレス"
で修正。
(masterに放り込む)
>git init // gitのディレクトリ
>git add README.md // REAME.mdに好きなことを書いておく(省略してもよい)
>git add *// 全部をローカルに保存
>git commit -m "first commit" // メッセージを付けて(ローカルに)コミットする
>git remote add origin https://github.com/TomoichiEbata/XXXXXX.git // リモートのリポジトリとリンクする>git push → これでアップロードできる >git push --set-upstream origin master
で、今、
Username for 'https://github.com': TomoichiEbata
Password for 'https://TomoichiEbata@github.com': ebata_no_password
remote: Support for password authentication was removed on August 13, 2021. Please use a personal access token instead.
remote: Please see https://github.blog/2020-12-15-token-authentication-requirements-for-git-operations/ for more information.
fatal: Authentication failed for 'https://github.com/username/repo.git/'
となってしまった。
で、これに対して、【Git】2021年8月13日からGitでリモートにアクセスができなくなった。
を参考にしてセッテイングしました。
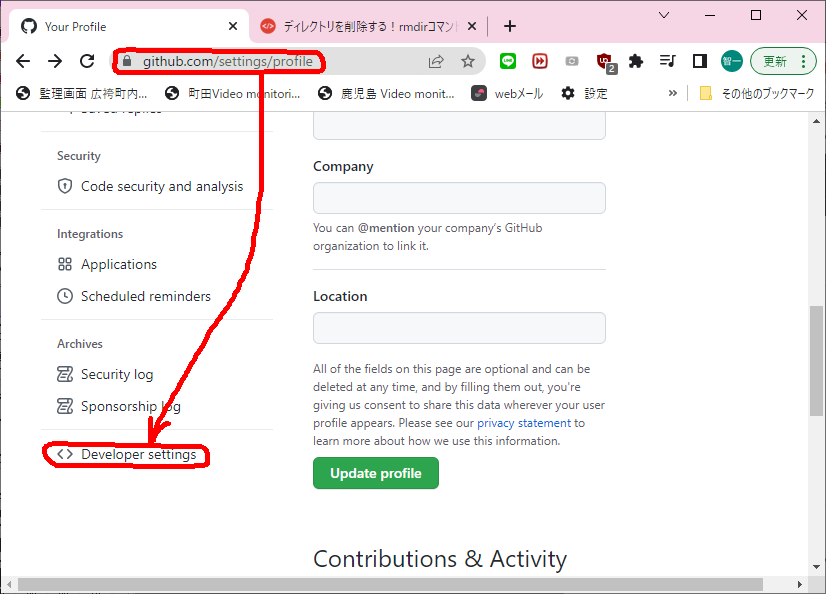
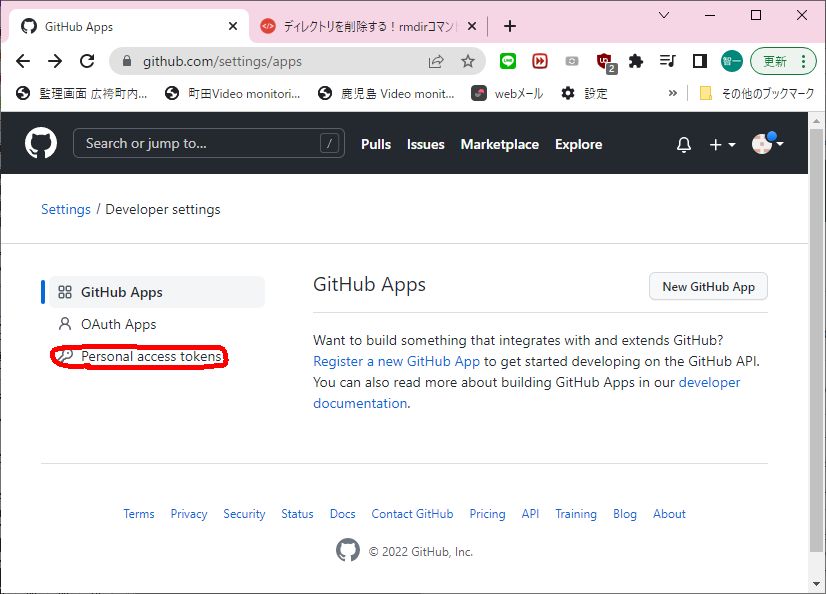
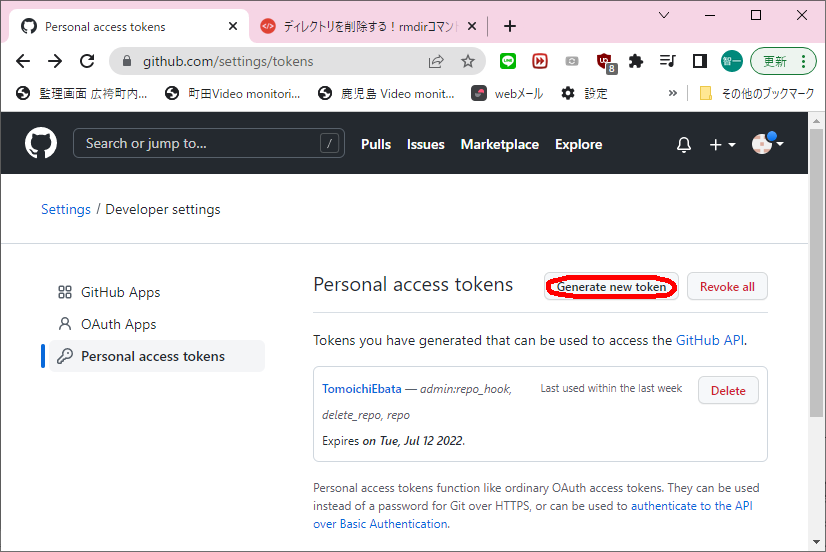
repoと、admin:repo_hookとdelete_repoにチェックを入れる
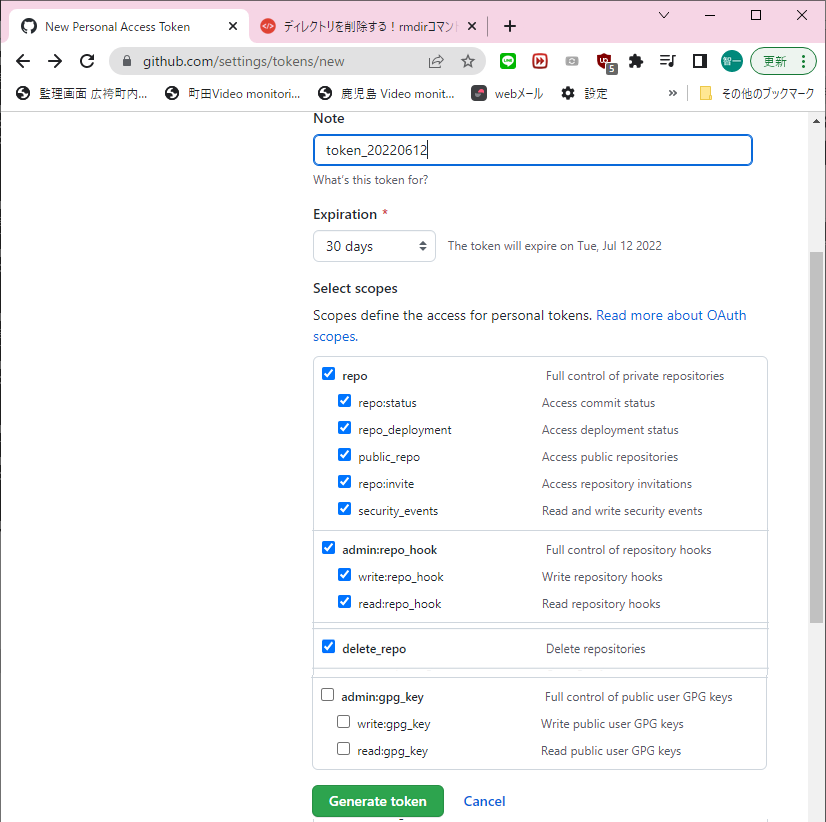
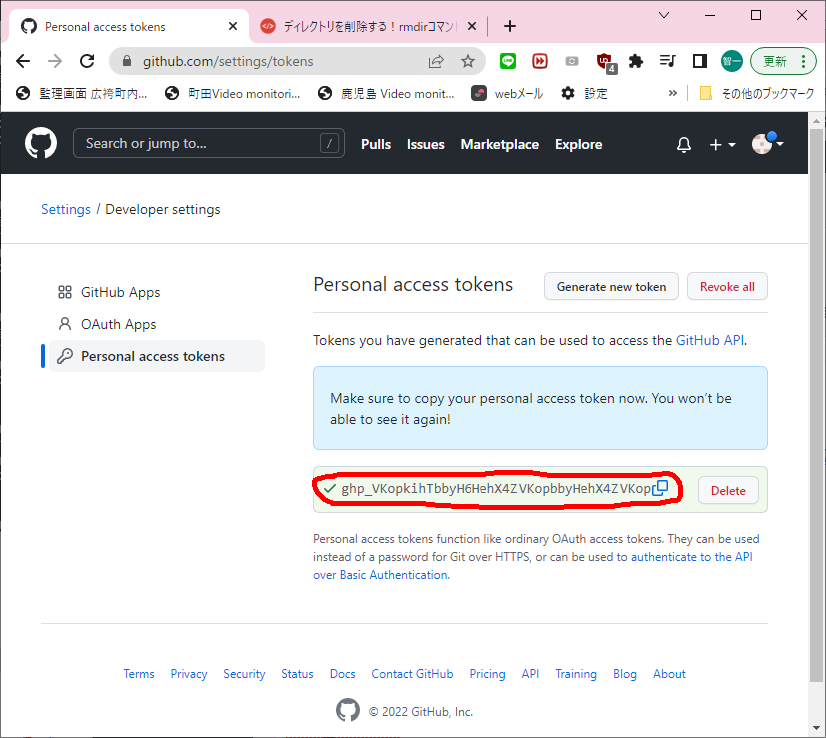
(ちなみにTokenの文字列はデタラメです)
とした上で、
C:\Users\ebata\money>git push --set-upstream origin master
Username for 'https://github.com':TomoichiEbata
Password for 'https://TomoichiEbata@github.com':(上記のTokenの文字列)
Enumerating objects: 30, done.
Counting objects: 100% (30/30), done.
Delta compression using up to 8 threads
Compressing objects: 100% (30/30), done.
Writing objects: 100% (30/30), 218.21 KiB | 5.20 MiB/s, done.
Total 30 (delta 4), reused 0 (delta 0), pack-reused 0
remote: Resolving deltas: 100% (4/4), done.
remote:
remote: Create a pull request for 'master' on GitHub by visiting:
remote: https://github.com/TomoichiEbata/money/pull/new/master
remote:
To https://github.com/TomoichiEbata/money.git
* [new branch] master -> master
Branch 'master' set up to track remote branch 'master' from 'origin'.
で、無事ログインできました。
(test_branchに放り込む)
>git branch test_branch // test_brachを作る
>git branch // ブランチを確認する
*master
test_branch
てな表示が出てくる。
>git checkout test_branch // これで"test_branch"の方に移動する
(ここでgoファイルを色々変更して、test_branchへの格納をする)
>git add *.go // goファイルをローカルに保存
>git commit -m "ブランチテスト" // テストブランチのコメント
>git push origin test_branch // test_branchの方に格納される
(mergeをしてみる)
>git checkout master // masterに移動
>git merge test_branch // test_branchの内容をmasterにマージ
>git push // アップロードする
(github.comの方で色々見ることができる)
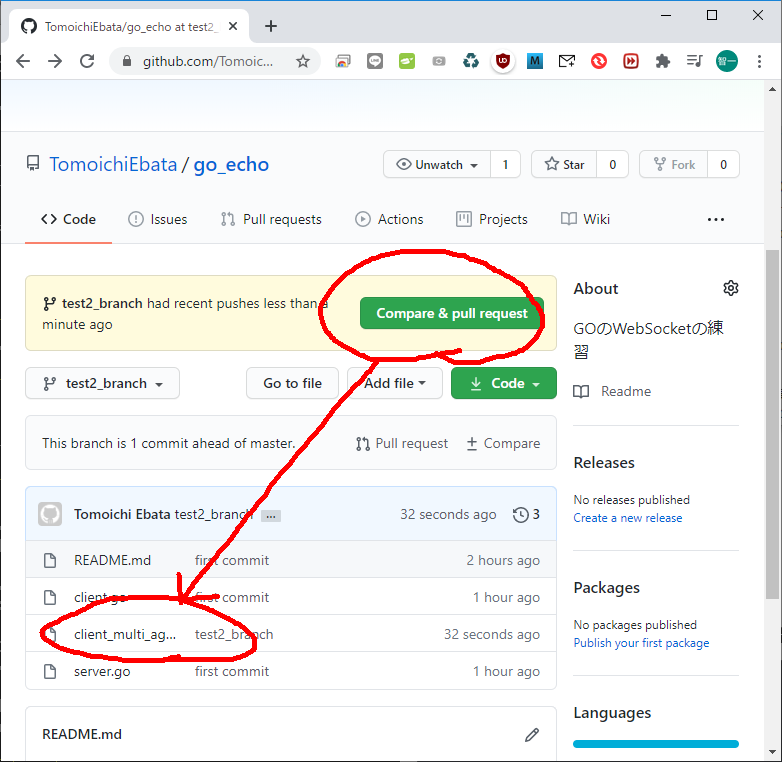
(Pull Request(プルリク)をしてみる)
プルリクとは、masterブランチと自分のブランチの差分を確認し、変なコードが混ざってないかなどをレビューする機能です。
>git branch test2_branch // test2_branchを作る
>git checkout test2_branch // test2_branchに移る
>git add *.go // goファイルをローカルに保存
>git commit -m "ブランチテスト2" // テストブランチ2のコメント
>git push origin test2_branch // test2_branchの方に格納される
で、アップロード(push)できたら、githubの画面を見る
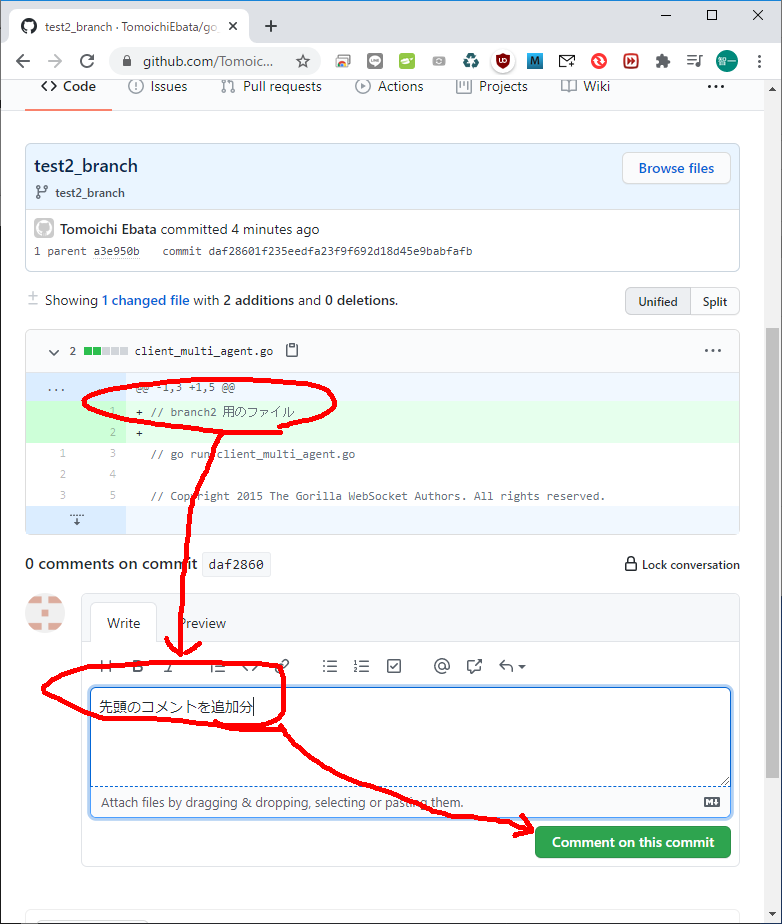
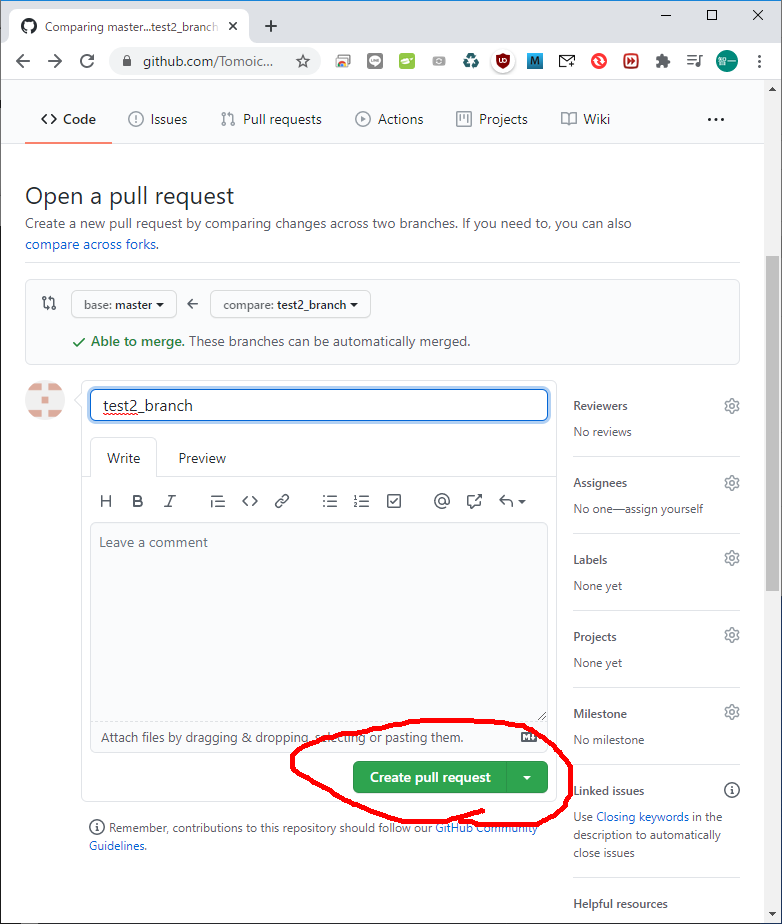
なんか聞かれますが、めげずに「Confirm merge」ボタンをおします。これでMasterにマージされます。
(変更をPull(ダウンロード)する)
>git checkout master
>git pull
すると、masterのコードが、ローカルにダウンロードされる。
(総括)
つまりローカルには、基本のファイルしかないのに、githubの中に、とっちらかったファイルが格納されていて、必要な時に必要なバージョンに戻れる、ということらしです。