2021/12,江端さんの技術メモ

■Windows Updateの後は、絶対にWindows Defenderの設定をしなおせ

■Windows Updateがなくても、「重い」と思ったら、Windows Defenderの設定を見ろ → 勝手に設定されているぞ

昨日から「Windows10が重くて使えない」という状態が続くので、タスクマネージャーを見てみたら、Antimalware Service Executableのメモリ消費量がシャレにならないくらい大きいことが分かりました。

メモリ/ディスクを使用する重いAntimalware Service Executableの対処法【停止も】

対処2: Windows Defenderのタスクスケジューラで設定を変更する

  1. 「Windowsマーク」をクリックし、「Windows管理ツール」→「タスクスケジューラ」の順にクリックします。
  2. タスクスケジューラの画面が表示されたら、左ペインで「タスクスケジューラライブラリ」をクリックしてツリーを展開します。
  3. 「Microsoft」→「Windows」→「Windows Defender」の順に展開します。
  4. 「Windows Defender」を選択して、右側にある「Windows Defender Scheduled Scan」をダブルクリックします。
  5. 画面が表示されたら「全般」タブを選択します。
  6. 画面下部にある「最上位の特権で実行する」のチェックを以下の4つの項目全部で外します。(つまり、以下の処理を項目ごとに、全部で4回やる、ということです)
  7. 「最上位の特権で実行する」のボタンが押せないので、「プロパティ」を押す

    ここからチェックを外す

  8. 「OK」をクリックします。

とりあえず、これで「Windows10が重くて使えない」状態は解消できるようになりました。


ノートPCも恐しく遅くて使えないので、この方法を試しました。現在、ちんたらと再起動処理をしているようですので、多分改善すると思います。

あやうくノートPCを廃棄してしまうところでした。


2021/12,江端さんの技術メモ

githubの中のファイルを直接編集したいだけなのに、色々調べたけど、余計な説明が多すぎて困っています。

上記の2つ(GitHub Repositories, GitHub Pull Request and Issues)がインストールされていることが前提です。

以下の操作をやるとできるようになるようです。

ブラウザに次の画面が次の画面が立ち上がってきます。

VSCodeの方に以下のメッセージが出てくるので「許可」を押下して下さい。

VSCodeにリポジトリの内容が表示されます。

編集するファイルを選んで、変更します。"test5"と記載して、ファイルをセーブして、以下の手続を行います。

コミットのメッセージを記載する。

以下のボタンを押して下さい。

Webで、反映されているのが確認できます。

本来は、ブランチとかマージとか、いろいろできるのでしょうが、とりあえず、iPad用の編集用に使えれば足りるので、これでいいのです。

https://vscode.dev で、編集もできそうだ、ということも確認しました。

ーーーー

コミットができなかったりするので、できたケースをもう一つ

変更してセーブすると「M」が表示されるので、以下の手順でコミットを進める。

の手順でコミットができるようです。

反映されています。

2021/12,江端さんの技術メモ

何だか分からんけど、動いたのでメモっておきます。

/C/Users/ebata/kese/VSC_C++_test

というディレクトリに、main.cpp とsub.cppを置く。

#include <stdio.h>

int sub(int, int);

int main() {
    int a = sub(2, 3);
    printf("%d\n", a);

    return 0;
}
#include <stdio.h>

int sub(int a, int b) {
    int c;
    c = a + b;

    return c;
}
  • 「Ctrl+Shift+P」 で、コマンドパレットを開く
  • 「C/C++: Edit configurations...」 を選択
  • 「.vscode」 フォルダの中に 「c_cpp_properties.json」 ファイルが作成される

c_cpp_properties.jsonは、以下のようになっている。

{
    "configurations": [
        {
            "name": "Win32",
            "includePath": [
                "${workspaceFolder}/**"
            ],
            "defines": [
                "_DEBUG",
                "UNICODE",
                "_UNICODE"
            ],
            "compilerPath": "C:\\msys64\\mingw64\\bin\\gcc.exe",
            "cStandard": "gnu17",
            "cppStandard": "gnu++14",
            "intelliSenseMode": "windows-gcc-x64"
        }
    ],
    "version": 4
}
  • 「Ctrl+Shift+P」 で、コマンドパレットを開く
  • 「Tasks: Configure Task」 を選択する
  • 「テンプレートから tasks.json を生成」 をクリック
  • 「Others 任意の外部コマンドを実行する例」 をクリック
  • 「.vscode」 フォルの中に 「tasks.json」 ファイルが作成される
  • 「tasks.json」 を下記のように変更する
{
    "version": "2.0.0",
    "tasks": [
        {
            "label": "sample",
            "type": "shell",
            "command": "g++",
            "args": [
                "-g",
                "main.cpp"
            ],
            "group": "build"
        },
        {
            "type": "cppbuild",
            "label": "C/C++: g++.exe アクティブなファイルのビルド",
            "command": "C:\\msys64\\mingw64\\bin\\g++.exe",
            "args": [
                "-fdiagnostics-color=always",
                "-g",
                "${file}",
                "sub.cpp" // ←ここがポイント
                "-o",
                "${fileDirname}\\${fileBasenameNoExtension}.exe"
            ],
            "options": {
                "cwd": "${fileDirname}"
            },
            "problemMatcher": [
                "$gcc"
            ],
            "group": {
                "kind": "build",
                "isDefault": true
            },
            "detail": "デバッガーによって生成されたタスク。"
        }
    ]
}
  • 「Ctrl+Shift+D」 でデバッグを実行する
  • 環境の選択のドロップダウンで、「C++ (GDB/LLDB)」を選択
  • 「.vscode」 フォルの中に 「launch.json」 ファイルが作成される
{
    // IntelliSense を使用して利用可能な属性を学べます。
    // 既存の属性の説明をホバーして表示します。
    // 詳細情報は次を確認してください: https://go.microsoft.com/fwlink/?linkid=830387
    "version": "0.2.0",
    "configurations": [
        {
            "name": "g++.exe - アクティブ ファイルのビルドとデバッグ",
            "type": "cppdbg",
            "request": "launch",
            "program": "${fileDirname}\\${fileBasenameNoExtension}.exe",
            "args": [],
            "stopAtEntry": false,
            "cwd": "${fileDirname}",
            "environment": [],
            "externalConsole": false,
            "MIMode": "gdb",
            "miDebuggerPath": "C:\\msys64\\mingw64\\bin\\gdb.exe",
            "setupCommands": [
                {
                    "description": "gdb の再フォーマットを有効にする",
                    "text": "-enable-pretty-printing",
                    "ignoreFailures": true
                },
                {
                    "description": "逆アセンブリ フレーバーを Intel に設定",
                    "text": "-gdb-set disassembly-flavor intel",
                    "ignoreFailures": true
                }
            ],
            "preLaunchTask": "C/C++: g++.exe アクティブなファイルのビルド"
        }
    ]
}

こんな感じで出てくる。

現時点では動いたり動かなかったりと、安定していません。

2021/12,江端さんの技術メモ

「ファイル」 → 「フォルダを開く」でフォルダを選択すれば、settings.jsonが出てこなくなる

フォルダの中に、".vscode"のディレクトリがって、その中には、以下のファイルが入っていることも必要(多分)

Visual Studio Code C/C++ 検討中


2021/12,2021/12,江端さんの忘備録,江端さんの技術メモ

Open Street Map(以下OSMといいます)とは、「自由に利用でき、なおかつ編集機能のある世界地図を作る共同作業プロジェクト」のことです。

Open Street Map (OSM) is a collaborative project to create a freely available, yet editable, map of the world.

一般的には、"xxxxx.osm"ファイルという名前の地図情報ファイルの意味で使われることが多いです。

In general, it is often used to mean a map information file named "xxxxxx.osm" file.

このようなomsファイルは、地図を使った交通シミュレーションを行う研究員にとっては、大変助かります。

These oms files are very helpful for researchers who are working on map-based traffic simulations.

しかし、OSMの地図は、世界中の人達の協力によって作られているものですし、そもそも、地図は常に拡張や変更を続けるものです。

However, OSM's maps are made with the cooperation of people from all over the world, and in the first place, maps are always expanding and changing.

「完璧な地図」などはありません。

There is no such thing as a "perfect map.

特に、自分の研究でomsファイルを使う場合、必要に応じて地図情報を正しく修正したいことがあります。

Especially when using oms files in my own research, I may want to modify the map information correctly if necessary.

-----

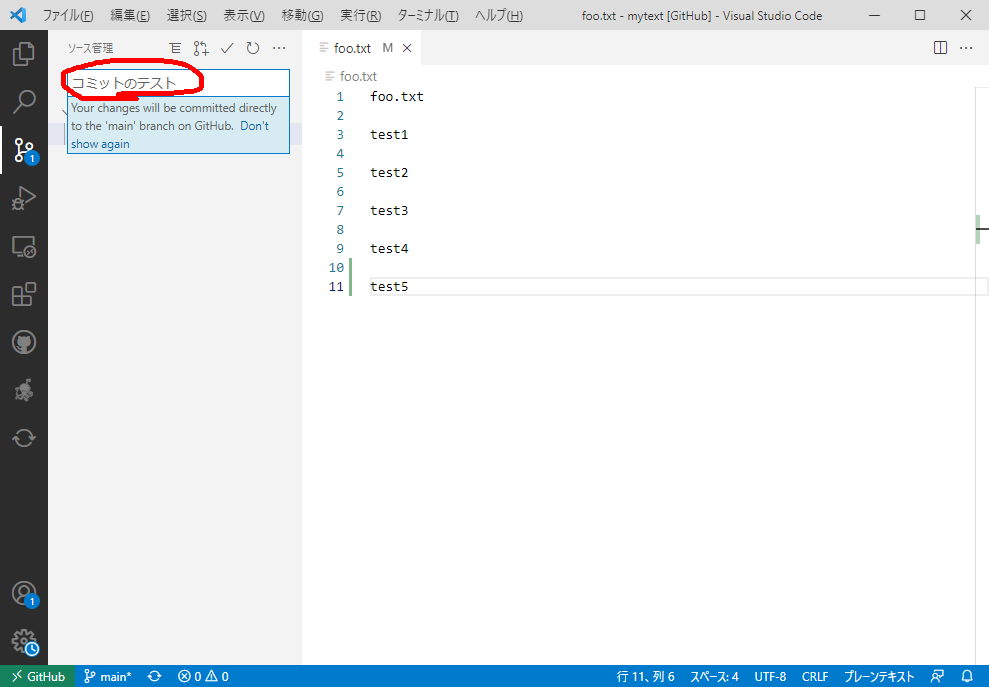
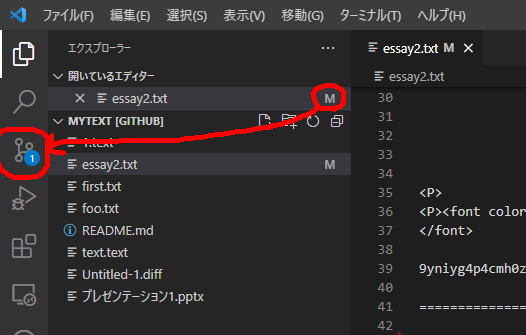
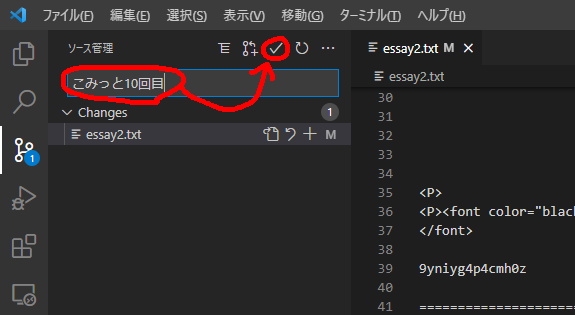
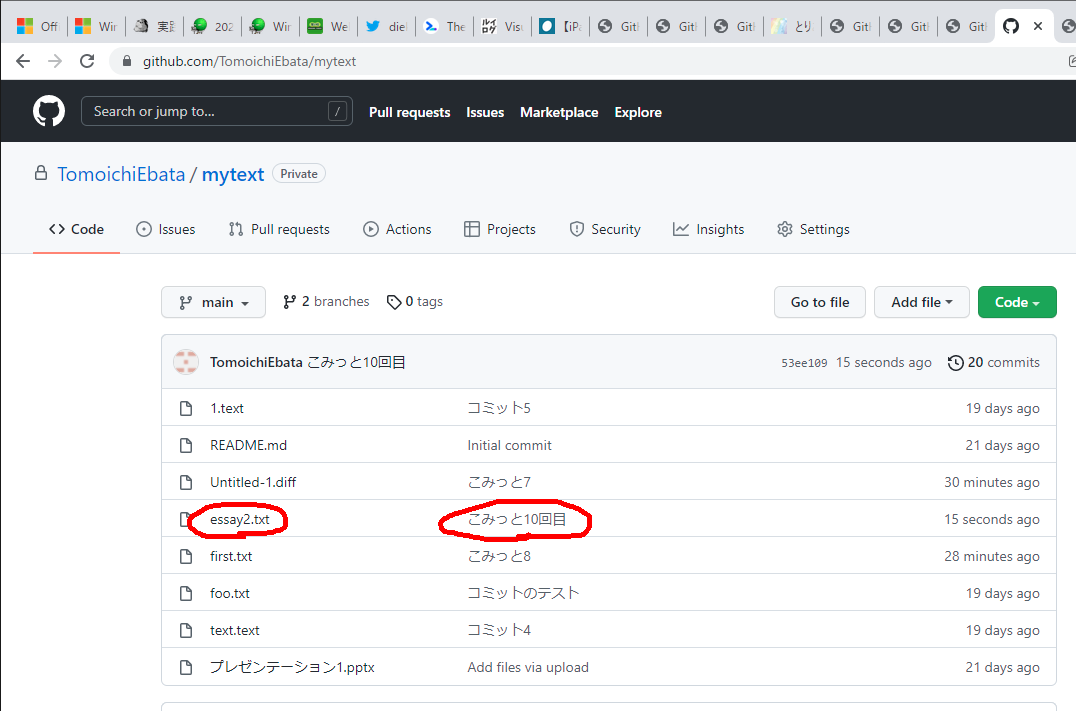
そんな訳で、今朝から、OSMの地図の編集を試みています。

That's why I've been trying to edit the OSM map since this morning.

以下は、横浜国立大学の敷地内の地図ですが、この中に、「自動車が入れる道」が記載されていなかったので、先程追記してみました。

The following is a map of the grounds of Yokohama National University, which I have just added to the map because it did not include a "car road".

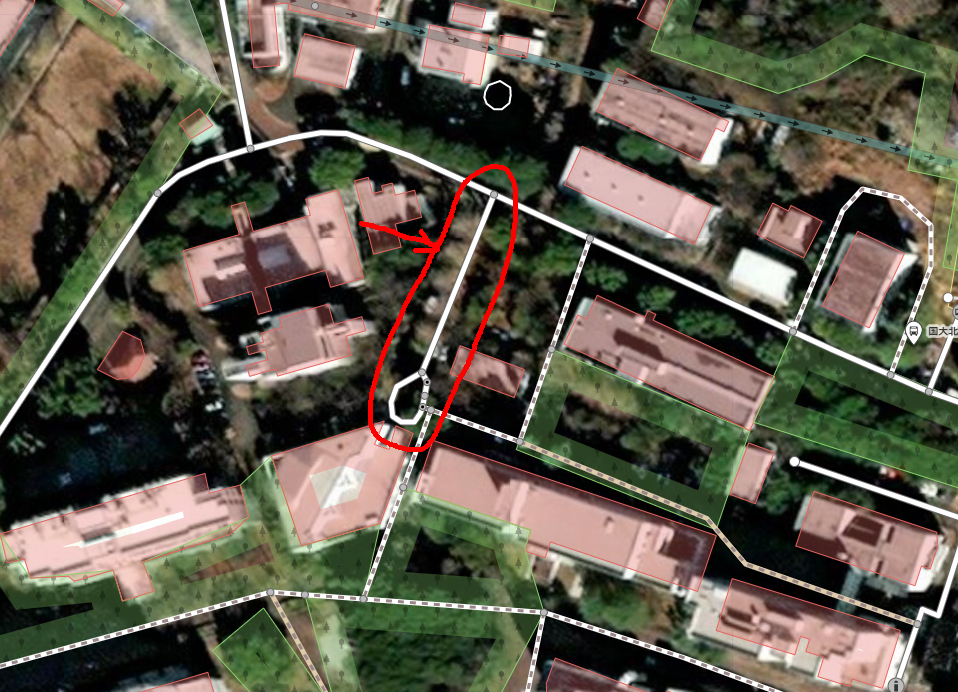
なぜ、私が大学キャンパスの道を知っているのか ―― そりゃもう、このキャンパスの中を、何百回、自動車と足で走り回り、GPSロガーでデータを取りまくったことか、分かりません ―― 仕事(屋外実証実験)で。

How do I know my way around a university campus? Well, I can't tell you how many times I've driven around this campus by car and foot, taking data with my GPS logger for my work (field demonstration).

-----

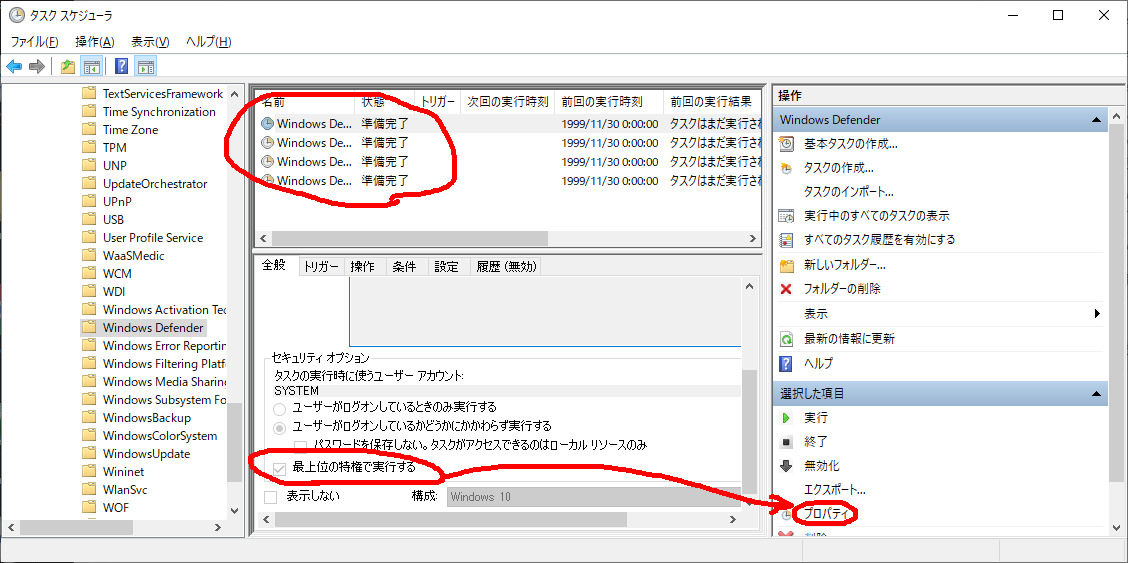
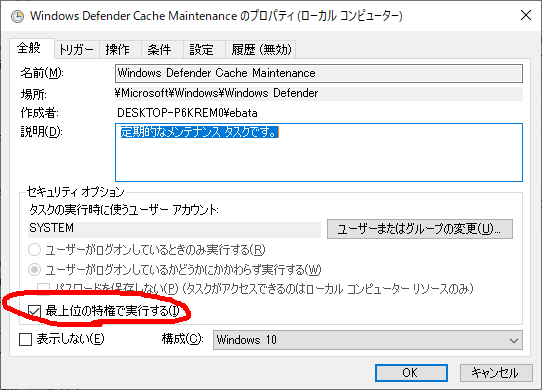
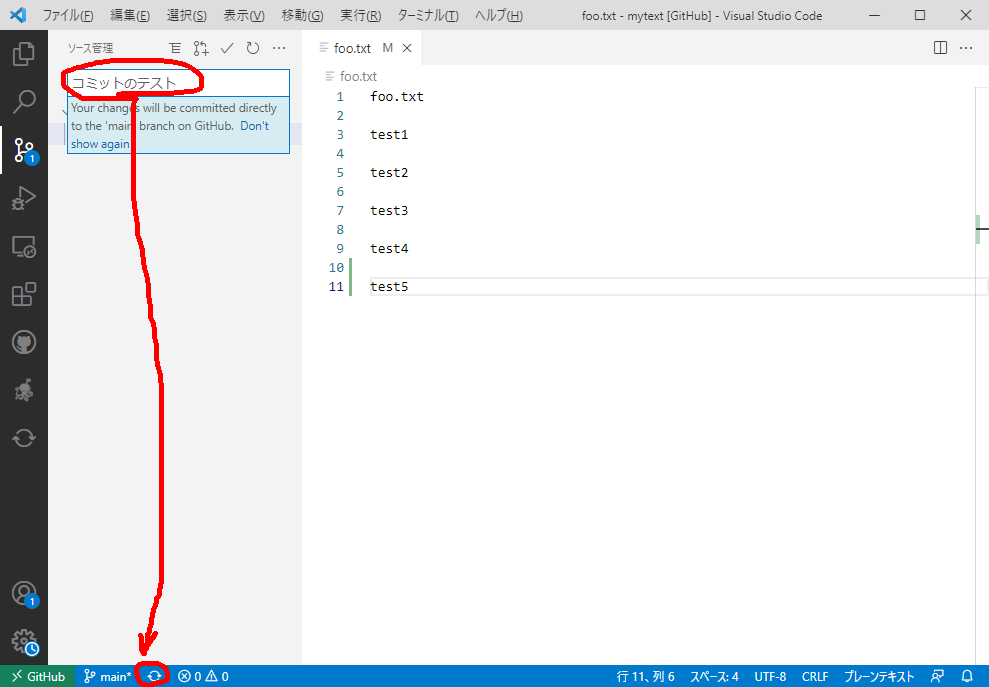
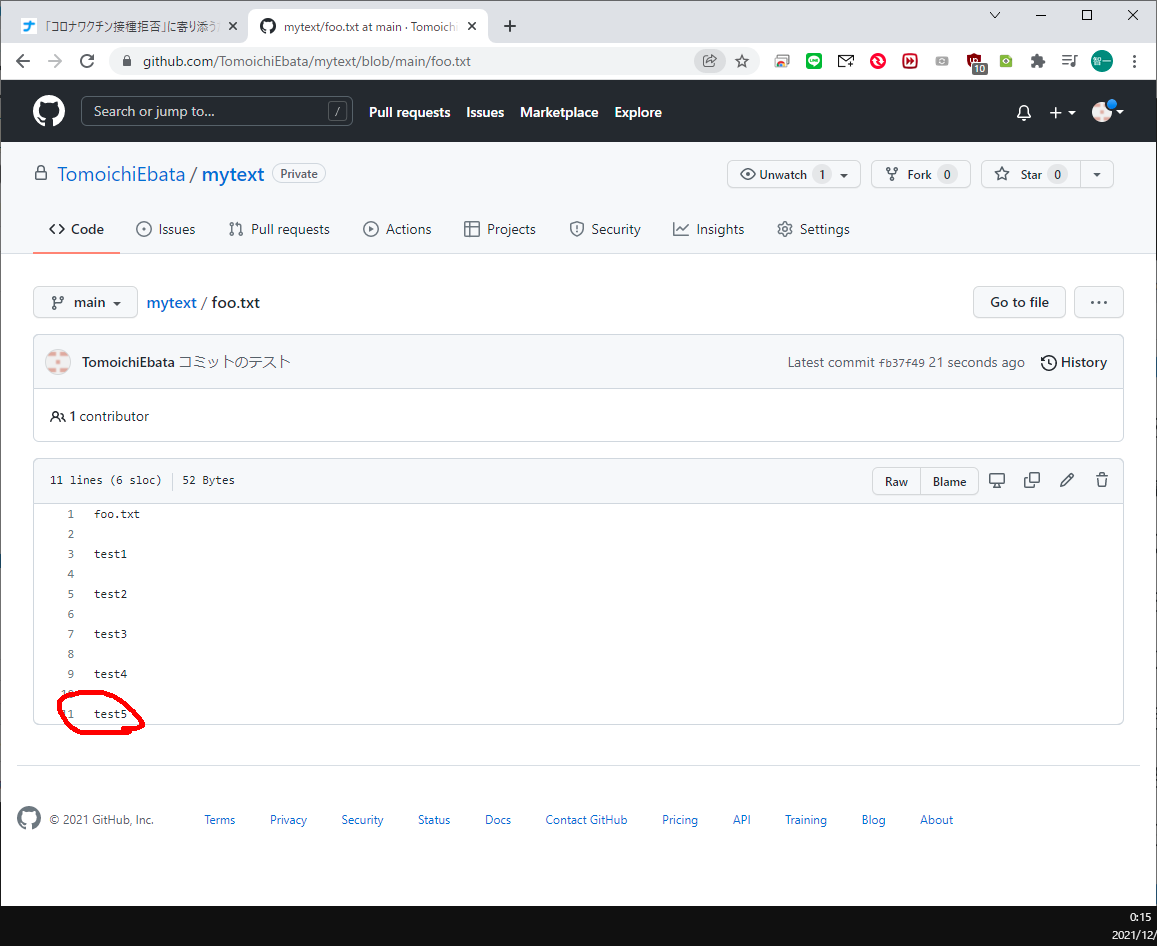
ところで、今朝の私のこの修正が、ボタン一つでOSM地図情報に登録されてしまって、唖然としています。

By the way, I was stunned to see that this correction of mine this morning was registered in the OSM Map Information with the click of a button.

修正後は、私の記載した地図が、世界中で反映されてしまうことになります。

After the revision, the map I described will be reflected all over the world.

―― 私の過失、または、悪意で、地図を改竄(かいざん)してしてしまったらどうするんだ?

"What if the map is tampered with due to my negligence or malicious intent?"

と、かなり不安な気持ちになってきました。

I came to feel quite uneasy.

なにしろ、今回の修正は、私の初めてのトライアルですので。

After all, this is my first trial with this modification.

そのような場合でも、多分、『だれかが私の改竄を修正する』、そして、『私が間違いを続ければ、私をOSMメンバから除名する』と期待しているのですが ――

Even in that case, I'm hoping that maybe "someone will correct my falsification" and "if I continue to be wrong, they will expel me from OSM membership" -- but I'm not sure.

それにしても、「自由に利用でき、なおかつ編集機能のある世界地図を作る共同作業プロジェクト」って凄いなぁ、と実感しています。

Anyway, I really feel that "a collaborative project to create a freely available, yet editable world map" is a great idea.

=====

実行手順

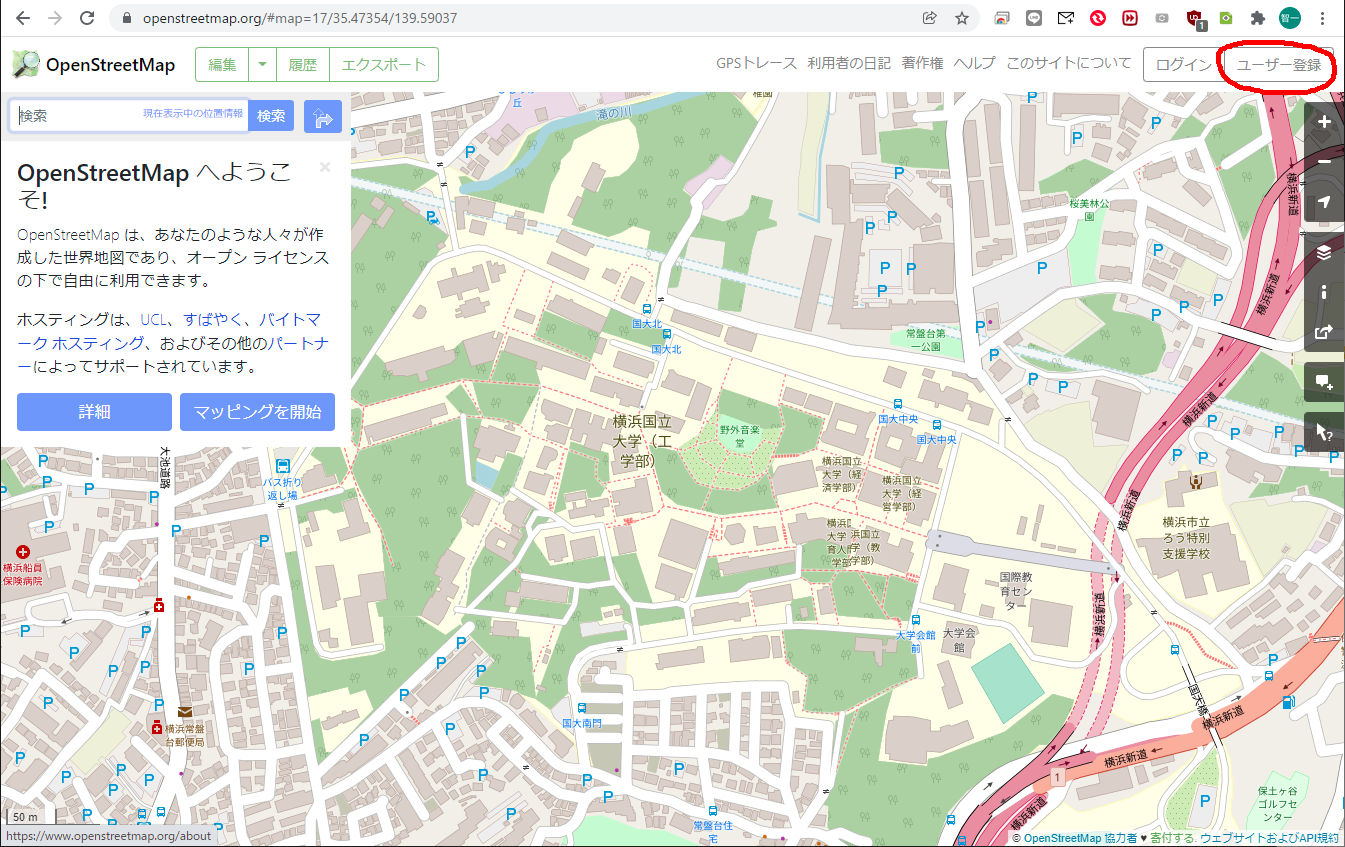
Step.1 https://www.openstreetmap.org/ から、「ユーザ登録」

Step.2 ユーザ登録します。

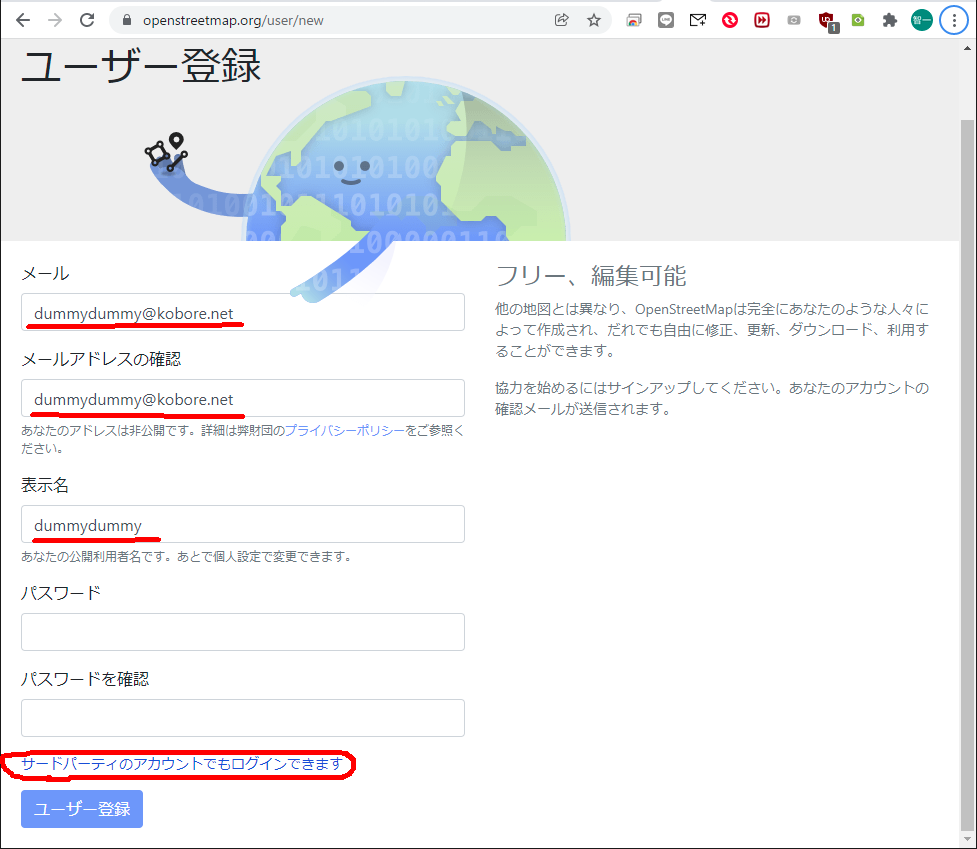
私の場合、サードパーティ認証にGoogleのログインを使うことにしました。

その後は、ガイダンス画面に入るので、そこで一通り勉強してから、編集作業をします(今日は割愛します)。

以上


2021/12,江端さんの技術メモ

エージェントオブジェクトの消滅方法に着目したコード

参照させて頂いたページ https://qiita.com/yoshinori_hisakawa/items/a6608b29059a945fbbbd

// https://qiita.com/yoshinori_hisakawa/items/a6608b29059a945fbbbd

package main

import (
	"context"
	"fmt"
	"sync"
	"time"
)

func main() {
	wg := sync.WaitGroup{}

	wg.Add(1)
	go grandparent(&wg)

	//time.Sleep(10 * time.Second)
	wg.Wait()
}

func grandparent(wg *sync.WaitGroup) {
	// contextを生成
	defer wg.Done()
	ctx := context.Background()

	// 親のcontextを生成し、parentに渡す
	ctxParent, cancel := context.WithCancel(ctx)
	go parent(ctxParent, "Hello-parent")

	// parentのcontextをキャンセル。mainを先に終了させないように1秒待ってから終了
	cancel()
	time.Sleep(1 * time.Second)
	fmt.Println("grandparent end")
}

func parent(ctx context.Context, str string) {
	// parentからcontextを生成し、childに渡す
	childCtx, cancel := context.WithCancel(ctx)
	go child(childCtx, "Hello-child")
	defer cancel()
	// 無限ループ
	for {
		select {
		case <-ctx.Done():
			fmt.Println(ctx.Err(), str)
			return
		}
	}
}

func child(ctx context.Context, str string) {
	// 無限ループ
	for {
		select {
		case <-ctx.Done():
			fmt.Println(ctx.Err(), str)
			return
		}
	}
}

// context canceled Hello-child
// context canceled Hello-parent
// grandparent end

2021/12,江端さんの技術メモ

私の作るエージェントプログラムは、エージェントが数千~数万回のレベルで発生ー消滅をするものなので、エジェントの消滅時に、確実にgoroutineを消滅させる必要があります。

しかし無限ループでイベント待ちをしているgoroutineを止める方法で、苦慮してきたのですが、問答無用でgoroutineを潰す、context.Contextというものを見つけて ―― 『これまでの苦労は一体なんだったんだ』と思っています。

まあ、こういうことって、結構ありますけどね。

package main

import (
	"context"
	"fmt"
	"time"
)

func main() {
	ctx, cancel := context.WithCancel(context.Background())
	go loop(ctx)

	// 2.5秒待つ
	time.Sleep(2500 * time.Millisecond)

	// ここで loop() を止める
	cancel()

	// 2回呼び出しても大丈夫
	cancel()

	println("finish")
}

// 無限ループする関数
func loop(ctx context.Context) {
	for {
		fmt.Println("test")
		time.Sleep(time.Second)
	}

}

親から子どもを一斉に消滅させる方法については、明日、片付けます。

なお、こっちの defer cancel()を使う方がスマートです。

package main

import (
	"context"
	"fmt"
	"time"
)

func main() {
	ctx, cancel := context.WithCancel(context.Background())
	go loop(ctx)
	defer cancel()

	// 2.5秒待つ
	time.Sleep(2500 * time.Millisecond)

	println("finish")
}

// 無限ループする関数
func loop(ctx context.Context) {
	for {
		fmt.Println("test")
		time.Sleep(time.Second)
	}

}


2021/12,江端さんの技術メモ

週末使って、色々試した結果、「チャネルを返り値とするサブルーチンは、fatal error: all goroutines are asleep - deadlock! となる」ということでした。

# まあ、 select-caseで、メソッドを直接使いたい、という変則的な使い方でしたので、仕方ありませんが、

package main

import "fmt"

func channel_test() chan int {
	ch := make(chan int)
	ch <- 1
	return ch
}
func main() {

	v := channel_test()
	fmt.Println(v)

	// go channe_test()とすれば動く

}

こんな使い方を想定していました。

for{
		select{
		case v:= <-channel_test():
			// do something 
		}
	}

続報:

ネットの質問版で質問してみたら、

ch := make(chan int)を、ch := make(chan int, 1)としたら動くよ、と教えて頂き、動作確認できました。

お詫びして訂正致します。
package main

import (
	"fmt"
	"time"
)

func channel_test() chan int {
	ch := make(chan int, 1)
	ch <- 1
	return ch
}
func main() {

	v := channel_test()
	fmt.Println(v)

	// go channe_test()とすれば動く

	for {
		select {
		case v := <-channel_test():
			fmt.Println("case v := <-channel_test():", v)
		}
		time.Sleep(time.Second)
	}

}
江端

2021/12,江端さんの技術メモ

これは、結構オーソドックスな手法で、いろいろなところに使われています。

/*
	お題: personが終了したらsubPerson1も subPerson2も強制的に終了させるには?
*/

package main

import (
	"fmt"
	"sync"
	"time"
)

func subPerson1(i int, wg *sync.WaitGroup, ch chan struct{}) {
	defer wg.Done()

	<-ch // close(ch)が発行されるまでロック (普通はselect待ちにする)
	fmt.Println("		End of sub_person1(", i, ")")

}

func subPerson2(i int, wg *sync.WaitGroup, ch chan struct{}) {
	defer wg.Done()
	<-ch // close(ch)が発行されるまでロック (普通はselect待ちにする)
	fmt.Println("		End of sub_person2(", i, ")")
}

func person(i int, wg *sync.WaitGroup) {
	fmt.Println("	Start... person(", i, ")")
	defer wg.Done()

	subWG := sync.WaitGroup{}

	subWG.Add(2)
	ch := make(chan struct{})
	go subPerson1(i, &subWG, ch)
	go subPerson2(i, &subWG, ch)

	time.Sleep(10 * time.Second)
	close(ch)

	subWG.Wait()

	fmt.Println("	End... person(", i, ")")
}

func main() {
	fmt.Println("start... main()")
	wg := sync.WaitGroup{}
	for i := 0; i < 5; i++ {
		wg.Add(1) // goルーチンを実行する関数分だけAddする

		go person(i, &wg)
	}

	wg.Wait()
	fmt.Println("end of ... main()")
}

出力結果はこんな感じです。
ちょっと変な感じがしますが、多分Printlnを記載している時間タイミングに因るものだろう、と思います。

$ go run main.go
start... main()
        Start... person( 4 )
        Start... person( 2 )
        Start... person( 3 )
        Start... person( 0 )
        Start... person( 1 )
                End of sub_person2( 2 )
                End of sub_person2( 0 )
                End of sub_person1( 0 )
        End... person( 0 )
                End of sub_person2( 4 )
                End of sub_person1( 4 )
        End... person( 4 )
                End of sub_person2( 3 )
                End of sub_person1( 3 )
        End... person( 3 )
                End of sub_person1( 2 )
        End... person( 2 )
                End of sub_person2( 1 )
                End of sub_person1( 1 )
        End... person( 1 )
end of ... main()