pandocを使ってMarkdownをepubにしたいんだけど、githubのREADME.mdと同じようなフォーマットで表示をさせたい件
の続きです。
ちなみに、pandocとは、こういうことができるツールです(興味のある人は、ググってインストールして下さい)。
それはさておき。
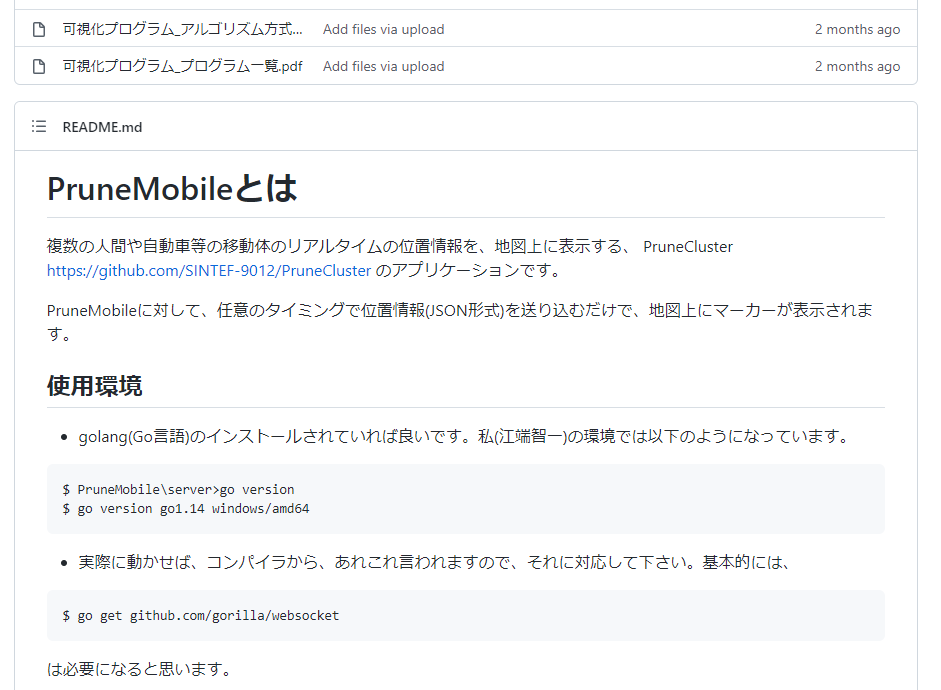
githubの最初のページに出てくるREADME.mdのフォーマットって、かっこいいですよね。

その上、Markdown言語で書くので、とっても簡単です。
今まで、Latexとか、htmlの記述で苦労してきたのがバカみたいです(まあ、技術系の記述だから、という理由もあると思いますが)
だから、このgithubのイメージをそのままにして、書籍化(epub形式)できないかな、と思っていたら、スタイルシートを変えるだけで行けました。
"github.css"で検索したら、色々出てくるようですが、私は以下のファイルを、"github.css"という名前で保存して使わせて貰いました。
body {
  font-family: Helvetica, arial, sans-serif;
  font-size: 14px;
  line-height: 1.6;
  padding-top: 10px;
  padding-bottom: 10px;
  background-color: white;
  padding: 30px; }

body > *:first-child {
  margin-top: 0 !important; }
body > *:last-child {
  margin-bottom: 0 !important; }

a {
  color: #4183C4; }
a.absent {
  color: #cc0000; }
a.anchor {
  display: block;
  padding-left: 30px;
  margin-left: -30px;
  cursor: pointer;
  position: absolute;
  top: 0;
  left: 0;
  bottom: 0; }

h1, h2, h3, h4, h5, h6 {
  margin: 20px 0 10px;
  padding: 0;
  font-weight: bold;
  -webkit-font-smoothing: antialiased;
  cursor: text;
  position: relative; }

h1:hover a.anchor, h2:hover a.anchor, h3:hover a.anchor, h4:hover a.anchor, h5:hover a.anchor, h6:hover a.anchor {
  background: url("../../images/modules/styleguide/para.png") no-repeat 10px center;
  text-decoration: none; }

h1 tt, h1 code {
  font-size: inherit; }

h2 tt, h2 code {
  font-size: inherit; }

h3 tt, h3 code {
  font-size: inherit; }

h4 tt, h4 code {
  font-size: inherit; }

h5 tt, h5 code {
  font-size: inherit; }

h6 tt, h6 code {
  font-size: inherit; }

h1 {
  font-size: 28px;
  color: black; }

h2 {
  font-size: 24px;
  border-bottom: 1px solid #cccccc;
  color: black; }

h3 {
  font-size: 18px; }

h4 {
  font-size: 16px; }

h5 {
  font-size: 14px; }

h6 {
  color: #777777;
  font-size: 14px; }

p, blockquote, ul, ol, dl, li, table, pre {
  margin: 15px 0; }

hr {
  background: transparent url("../../images/modules/pulls/dirty-shade.png") repeat-x 0 0;
  border: 0 none;
  color: #cccccc;
  height: 4px;
  padding: 0; }

body > h2:first-child {
  margin-top: 0;
  padding-top: 0; }
body > h1:first-child {
  margin-top: 0;
  padding-top: 0; }
  body > h1:first-child + h2 {
    margin-top: 0;
    padding-top: 0; }
body > h3:first-child, body > h4:first-child, body > h5:first-child, body > h6:first-child {
  margin-top: 0;
  padding-top: 0; }

a:first-child h1, a:first-child h2, a:first-child h3, a:first-child h4, a:first-child h5, a:first-child h6 {
  margin-top: 0;
  padding-top: 0; }

h1 p, h2 p, h3 p, h4 p, h5 p, h6 p {
  margin-top: 0; }

li p.first {
  display: inline-block; }

ul, ol {
  padding-left: 30px; }

ul :first-child, ol :first-child {
  margin-top: 0; }

ul :last-child, ol :last-child {
  margin-bottom: 0; }

dl {
  padding: 0; }
  dl dt {
    font-size: 14px;
    font-weight: bold;
    font-style: italic;
    padding: 0;
    margin: 15px 0 5px; }
    dl dt:first-child {
      padding: 0; }
    dl dt > :first-child {
      margin-top: 0; }
    dl dt > :last-child {
      margin-bottom: 0; }
  dl dd {
    margin: 0 0 15px;
    padding: 0 15px; }
    dl dd > :first-child {
      margin-top: 0; }
    dl dd > :last-child {
      margin-bottom: 0; }

blockquote {
  border-left: 4px solid #dddddd;
  padding: 0 15px;
  color: #777777; }
  blockquote > :first-child {
    margin-top: 0; }
  blockquote > :last-child {
    margin-bottom: 0; }

table {
  padding: 0; }
  table tr {
    border-top: 1px solid #cccccc;
    background-color: white;
    margin: 0;
    padding: 0; }
    table tr:nth-child(2n) {
      background-color: #f8f8f8; }
    table tr th {
      font-weight: bold;
      border: 1px solid #cccccc;
      text-align: left;
      margin: 0;
      padding: 6px 13px; }
    table tr td {
      border: 1px solid #cccccc;
      text-align: left;
      margin: 0;
      padding: 6px 13px; }
    table tr th :first-child, table tr td :first-child {
      margin-top: 0; }
    table tr th :last-child, table tr td :last-child {
      margin-bottom: 0; }

img {
  max-width: 100%; }

span.frame {
  display: block;
  overflow: hidden; }
  span.frame > span {
    border: 1px solid #dddddd;
    display: block;
    float: left;
    overflow: hidden;
    margin: 13px 0 0;
    padding: 7px;
    width: auto; }
  span.frame span img {
    display: block;
    float: left; }
  span.frame span span {
    clear: both;
    color: #333333;
    display: block;
    padding: 5px 0 0; }
span.align-center {
  display: block;
  overflow: hidden;
  clear: both; }
  span.align-center > span {
    display: block;
    overflow: hidden;
    margin: 13px auto 0;
    text-align: center; }
  span.align-center span img {
    margin: 0 auto;
    text-align: center; }
span.align-right {
  display: block;
  overflow: hidden;
  clear: both; }
  span.align-right > span {
    display: block;
    overflow: hidden;
    margin: 13px 0 0;
    text-align: right; }
  span.align-right span img {
    margin: 0;
    text-align: right; }
span.float-left {
  display: block;
  margin-right: 13px;
  overflow: hidden;
  float: left; }
  span.float-left span {
    margin: 13px 0 0; }
span.float-right {
  display: block;
  margin-left: 13px;
  overflow: hidden;
  float: right; }
  span.float-right > span {
    display: block;
    overflow: hidden;
    margin: 13px auto 0;
    text-align: right; }

code, tt {
  margin: 0 2px;
  padding: 0 5px;
  white-space: nowrap;
  border: 1px solid #eaeaea;
  background-color: #f8f8f8;
  border-radius: 3px; }

pre code {
  margin: 0;
  padding: 0;
  white-space: pre;
  border: none;
  background: transparent; }

.highlight pre {
  background-color: #f8f8f8;
  border: 1px solid #cccccc;
  font-size: 13px;
  line-height: 19px;
  overflow: auto;
  padding: 6px 10px;
  border-radius: 3px; }

pre {
  background-color: #f8f8f8;
  border: 1px solid #cccccc;
  font-size: 13px;
  line-height: 19px;
  overflow: auto;
  padding: 6px 10px;
  border-radius: 3px; }
  pre code, pre tt {
    background-color: transparent;
    border: none; }
因みに、元のmdファイルは、自分のgithubから持ってきた、このファイルを、"README_1.md"という名前で保存しました。
# PruneMobileとは
複数の人間や自動車等の移動体のリアルタイムの位置情報を、地図上に表示する、
PruneCluster https://github.com/SINTEF-9012/PruneCluster
のアプリケーションです。
PruneMobileに対して、任意のタイミングで位置情報(JSON形式)を送り込むだけで、地図上にマーカーが表示されます。
## 使用環境
- golang(Go言語)のインストールされていれば良いです。私(江端智一)の環境では以下のようになっています。
```
$ PruneMobile\server>go version
$ go version go1.14 windows/amd64
```
- 実際に動かせば、コンパイラから、あれこれ言われますので、それに対応して下さい。基本的には、
```
$ go get github.com/gorilla/websocket
```
は必要になると思います。
## サンプルプログラムの環境
- Webブラウザで表示される地図は、東京都江東区の豊洲駅を中心にして作ってあります。
- PruneMobile\server\serverX.go (Xは数字) の中にある、
```
var map = L.map("map", {
attributionControl: false,
zoomControl: false
}).setView(new L.LatLng(35.654543, 139.795534), 18);
```
の"35.654543, 139.795534"の座標を変更すれば、地図の中心位置が変わります。
- クライアントプログラムでは、豊洲駅を中心にランダムウォークさせています
- PruneMobile\server\clientX.go (Xは数字)を起動すると、10秒間程、マーカーが移動して、その後消滅します。
- クライアントプログラム(clientX.go)は複数同時に起動させることができます。
## 現時点で確認している問題点で、いずれ直すもの
- ~~マーカーの消滅のタイミングが、同時になってしまう~~
- ~~Webブラウザの表示が、最初の1つめしか、正常に動作しない~~
- ローカルのjs(javascript)のローディングに失敗した為、江端のプライベートサーバ(kobore.net)からローディングしている。PruneMobile\server\serverX.goの以下を参照
```
<script src="http://kobore.net/PruneCluster.js"></script>
<link rel="stylesheet" href="http://kobore.net/examples.css"/>
```
# サンプルプログラムの動作方法
## Step 1 サーバの起動
適当なシェルを立ち上げて
```
$ cd PruneMobile\server
$ go run serverX.go (Xは数字)
```
とすると、「Windowsセキュリティの重要な警告(windows10の場合)」が出てくるので、「アクセスを許可する」ボタンを押下して下さい。
## Step 2 地図画面(マーカ表示画面)の起動
Chromoブラウザ(他のブラウザのことは知らん)から、
```
http://localhost:8080/
```
と入力して下さい。豊洲地区の地図が表示されます。
## Step 3 移動オブジェクト(マーカの対象)の起動
適当なシェルを立ち上げて
```
$ cd PruneMobile\client
$ go run clientX.go (Xは数字)
```
とすると、マーカが0.5秒単位でランダムに動きます。
## 動作の様子

# クライアントプログラムで使うI/F(データ形式)
## 前提
- サーバとwebsocketのコネクションを確立して下さい。方法は問いません。golangでの記述方法はclient/clientX.goを参考にして下さい。
- データ形式はJSONを用います。golangでの記載サンプルは以下の通りです。
```
// GetLoc GetLoc
type GetLoc struct {
ID int `json:"id"`
Lat float64 `json:"lat"`
Lng float64 `json:"lng"`
//Address string `json:"address"`
}
```
## Step.1 マーカーの登録
IDを"0"にして、最初のマーカーの座標を入力したJSONを、サーバに送付して下さい。golangでの送信方法はは以下の通りです。
```
gl := GetLoc{
ID: 0,
Lat: 35.653976,
Lng: 139.796821,
}
err = c.WriteJSON(gl)
if err != nil {
log.Println("write:", err)
}
```
返り値に入ってきたIDが、これからそのマーカで使うID番号となります。golangでの受信方法はは以下の通りです。
```
gl2 := new(GetLoc)
err = c.ReadJSON(gl2)
log.Printf("after ID:%d", gl2.ID)
log.Printf("after Lat:%f", gl2.Lat)
log.Printf("after Lng:%f", gl2.Lng)
```
以後、このID番号(整数)を使用して下さい。この番号と異なる番号を使用した場合、動作は保証されません。
## Step.2 マーカーの移動
指定されたIDを使って、移動後の座標を送付して下さい。
```
gl := GetLoc{
ID: 5, // IDが"5"の場合
Lat: 35.653923,
Lng: 139.796852,
}
err = c.WriteJSON(gl)
if err != nil {
log.Println("write:", err)
}
```
返り値は、入力と同じJSONが戻ってきますが、必ず受信して下さい。
```
gl2 := new(GetLoc)
err = c.ReadJSON(gl2)
log.Printf("after ID:%d", gl2.ID)
log.Printf("after Lat:%f", gl2.Lat)
log.Printf("after Lng:%f", gl2.Lng)
```
## Step.3 マーカーの抹消
指定されたIDを使って、地球上の緯度経度の数値で現わせない座標を入力して下さい。具体的に、latに90.0より大きな値、またはlngに180より大きな値を入力することで、マーカが消去されます。
```
gl := GetLoc{
ID: 5, // IDが"5"の場合
Lat: 999.9,
Lng: 999.9,
}
err = c.WriteJSON(gl)
if err != nil {
log.Println("write:", err)
}
```
返り値は、入力と同じJSONが戻ってきますが、必ず受信して下さい。
```
gl2 := new(GetLoc)
err = c.ReadJSON(gl2)
log.Printf("after ID:%d", gl2.ID)
log.Printf("after Lat:%f", gl2.Lat)
log.Printf("after Lng:%f", gl2.Lng)
```
# Amazon Lightsail を使った、スマホの現在位置の表示方法
PruneMobileは、シミュレータ等で計算した位置情報を、ブラウザで表示することを目的としたものですが、これを、現実のスマホの位置の検知にも使えるようにしました(要するに「ココセコム」としても使える、ということです)
これを実現する為には、インターネット上に(クラウド)サーバを置かなければなりません。AWSのVPS(仮想専用サーバー)が思いつきますが、AWSのEC2は6運用が面倒な上に使用料が高価です。そこで「月額 500 円で使えるAWSクラウドのVPS」を使う方法について記載しておきます。
- Amazon Lightsail の立ち上げ方法については、https://wp.kobore.net/江端さんの技術メモ/post-1513/ を参考にして下さい。
- ここでは、"sea-anemone.tech"という架空のドメインを例として使っていますが、外部(例えば「お名前.com」)でドメインを得た場合は、その名前に置き換えて読んで下さい。
- 公開鍵の取得方法については、https://wp.kobore.net/江端さんの技術メモ/post-1550/ を参考にして下さい(ここに記載されている、"go_template/server_test"は、"PruneMobile\vps_server"と読み換えて下さい)
## Step 1 サーバの起動
Amazon Lightsailのシェルから適当なシェルを立ち上げて
```
$ cd PruneMobile\vps_server
$ go run serverXX.go (Xは数字)
```
と起動して下さい。
## Step 2 地図画面(マーカ表示画面)の起動
Chromoブラウザ(他のブラウザのことは知らん)から、
```
https://sea-anemone:8080/
```
と入力して下さい。現在は、東京のある地域が表示されますが、serverXX.go の中に記載れている、位置情報、35.60000, 139.60000 を片っぱしから、任意の位置(自宅の位置等)に変更することで、自宅付近での実証実験ができます。
自宅の情報は、GoogleMAPから取得できます。
## Step 3 移動オブジェクト(マーカの対象)の起動
スマホのブラウザから、
```
https://sea-anemone:8080/smartphone
```
として、[open]ボタンを押して下さい。スマホで位置測位が開始されます(この際、位置情報を提供して良いか、と聞きあれることがありますので、"OK"として下さい)。
[close]ボタンを押下すると地図画面からマーカが消えます。
## 現時点で確認している問題点で、いずれ直すもの
- ローカルのjs(javascript)のローディングに失敗した為、江端のプライベートサーバ(kobore.net)からローディングしている。PruneMobile\vps_server\serverXX.goの以下を参照
```
<script src="http://kobore.net/PruneCluster.js"></script>
<link rel="stylesheet" href="http://kobore.net/examples.css"/>
```
- 動作中にwebsocketが切断してしまった時(スマホの閉じる、別のブラウザ画面を立ち上げた時)、オブジェクトが放置されて、システム全体が動かなくなるPruneMobile_demo.png は、同じディレクトリに放り込んでおきました。
でもって、
ebata@DESKTOP-P6KREM0 MINGW64 ~/eBook_sample_with_markdown_and_pandoc
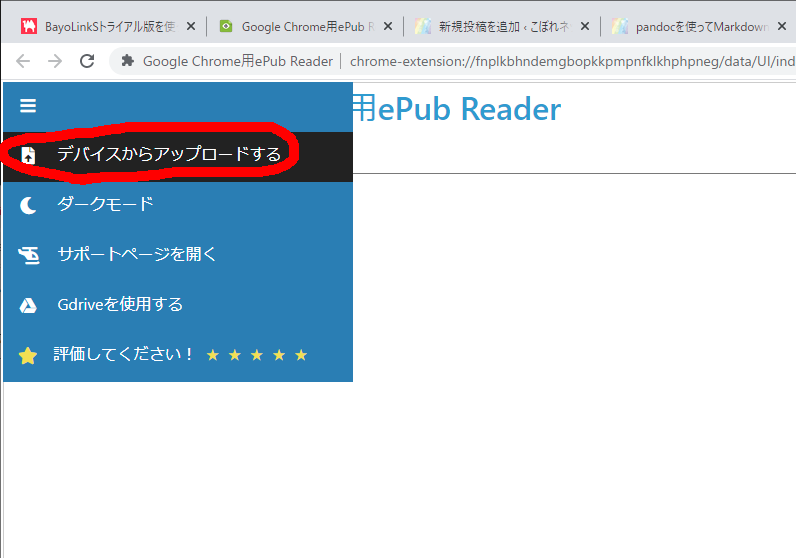
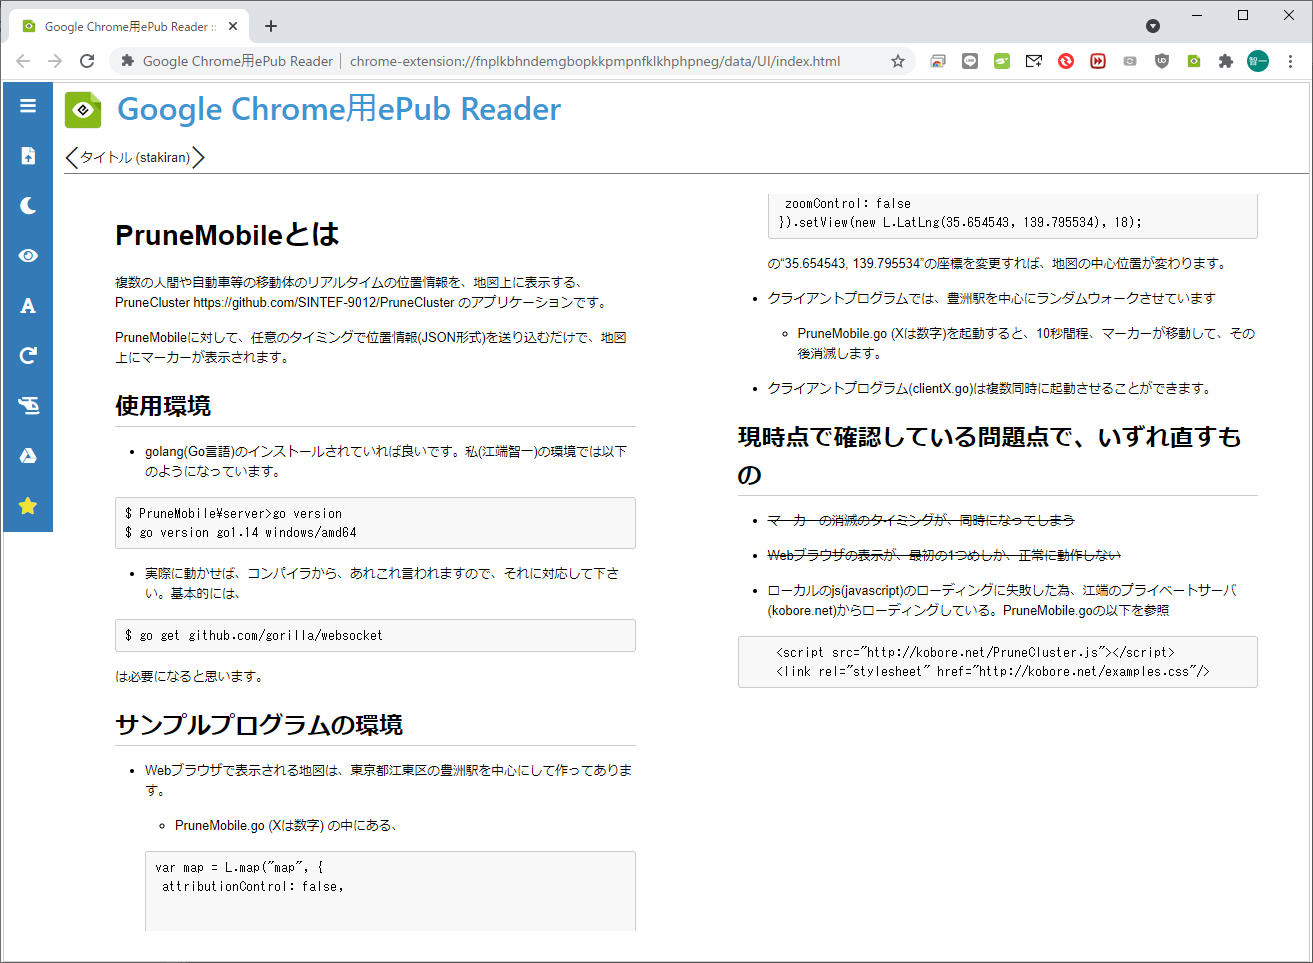
$ pandoc -f markdown -t epub3 README_1.md title.txt -o book.epub --css github.css --toc --toc-depth=2 --epub-cover-image=cover.jpgを実行して、chromoの拡張機能としてアドインしておいた、epubリーダを使って"book.epub"を表示したら、

こんな感じで表示されるようになりました。

これで、一応「mdファイルを作成して、epubファイルにするまでの方法」を、(とりあえず)確立できました。
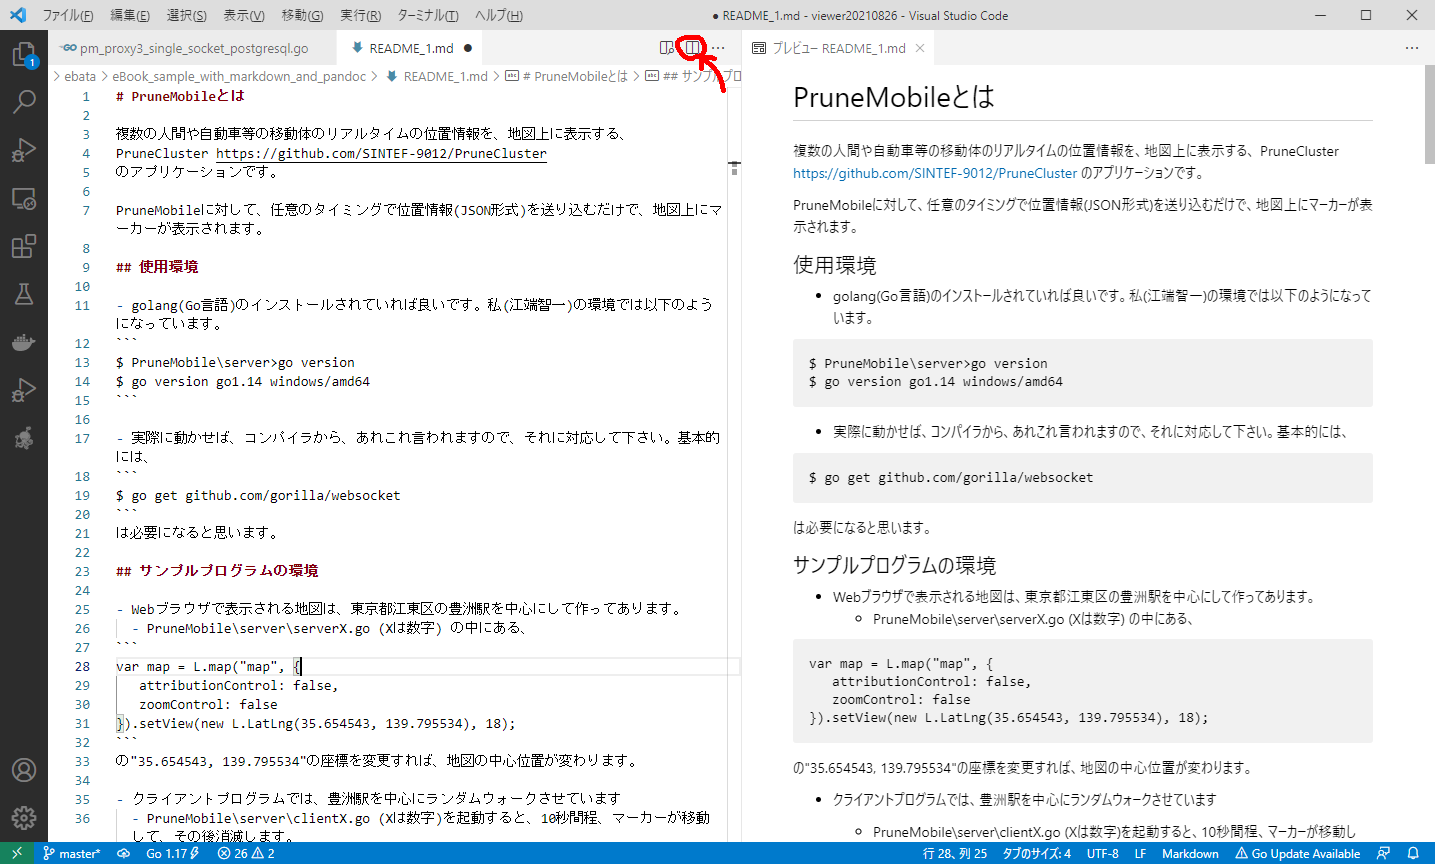
それと、 md(Markdown)ファイルを編集するなら、Visual Studio Codeが便利そうです。
編集とビューが連動しているので、いちいちビューアーで確認する必要がありません。

以上