DockerでFlutterを試してみる
WindowsのDockerでFlutter for Web(開発環境構築)
https://qiita.com/toshibe/items/e05ebe152e579ad39a58
で、色々問題がでてくるけど、
Flutter
https://qiita.com/tiri/items/5ad8d173df2c3823a265
の記載の内容で対応できました。
動かし方
1. Dockerfileからイメージを作成する
docker-compose build
2. イメージからコンテナを作成し、起動する
docker-compose up -d
3. 起動したコンテナに入る
docker exec -it flutter bash
4. フラッターアプリを作成する
cd workspace
flutter create .
5. サーバーを立ち上げる
flutter run -d web-server --web-port=${WEB_SERVER_PORT} --web-hostname 0.0.0.0
さて、これでサンプルは動かせたんだけど、さて、コーディングはどうやるのかな?
docker exec -it flutter bash でシェルに入った後、
root@0c0fd167601e:/usr/local# ls
Android bin etc flutter games include lib man sbin share src workspace
root@0c0fd167601e:/usr/local# cd workspace/
root@0c0fd167601e:/usr/local/workspace# ls
README.md android ios linux pubspec.lock test windows
analysis_options.yaml build lib macos pubspec.yaml web workspace.iml
root@0c0fd167601e:/usr/local/workspace# cd test
root@0c0fd167601e:/usr/local/workspace/test# ls
widget_test.dart ← これがターゲットのソース(だと思う)
root@0c0fd167601e:/usr/local/workspace/test#more widget_test.dart
// This is a basic Flutter widget test.
//
// To perform an interaction with a widget in your test, use the WidgetTester
// utility in the flutter_test package. For example, you can send tap and scroll
// gestures. You can also use WidgetTester to find child widgets in the widget
// tree, read text, and verify that the values of widget properties are correct.

import 'package:flutter/material.dart';
import 'package:flutter_test/flutter_test.dart';

import 'package:workspace/main.dart';

void main() {
  testWidgets('Counter increments smoke test', (WidgetTester tester) async {
    // Build our app and trigger a frame.
    await tester.pumpWidget(const MyApp());

    // Verify that our counter starts at 0.
    expect(find.text('0'), findsOneWidget);
    expect(find.text('1'), findsNothing);

    // Tap the '+' icon and trigger a frame.
    await tester.tap(find.byIcon(Icons.add));
    await tester.pump();

    // Verify that our counter has incremented.
    expect(find.text('0'), findsNothing);
    expect(find.text('1'), findsOneWidget);
  });
}
という記載が見える。

とりあえず、ここを書き換えれば、最初のアプリが作れるのかな、とアタリを付けています。
上記間違いでした。
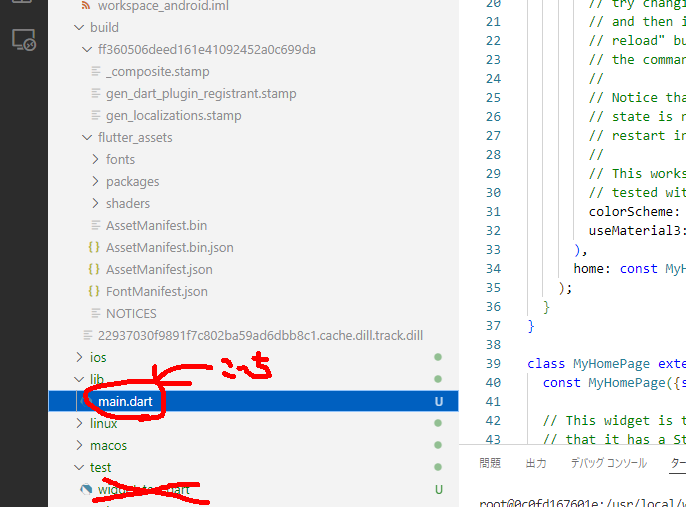
vscodeで直接dockerコンテナの中を編集できるので、(これについては、どこかで話ます)、ターゲットは、lib/main.dartでした。
で、ちょっと変えて動くかどうか調べてみました。
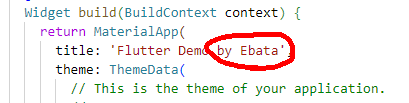


という変更をして、
flutter run -d web-server --web-port=${WEB_SERVER_PORT} --web-hostname 0.0.0.0
を実施してみました。
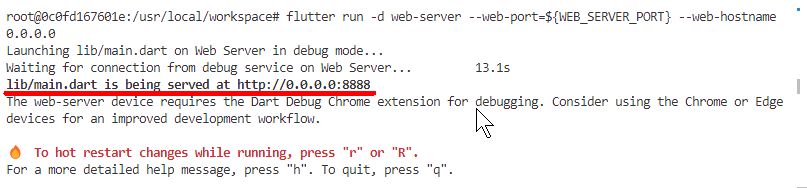
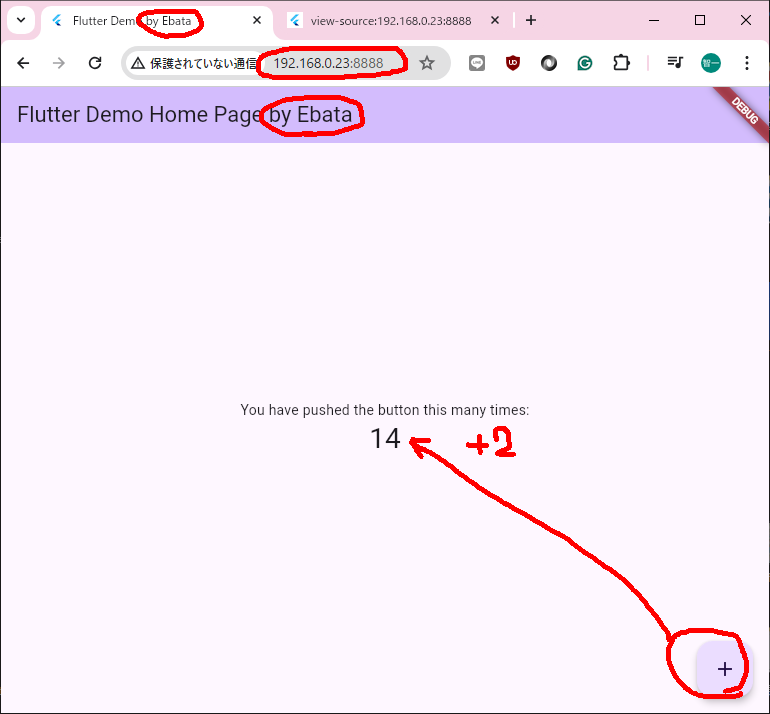
で、http://192.168.0.23:8888 (192.168.0.23: DockerコンテナのあるPC)で、ちゃんと変更されているようです。
とりあえず、これで、改造するポイント分かりました。
その後、このlib/main.dartを
https://zenn.dev/ryouhei_furugen/articles/583b1003ebcfc1の
(Flutterのサンプル カウンターアプリ)にさしかえさせて頂きました。
問題なく動きました。
https://docs.flutter.dev/get-started/test-drive
ざっくり、翻訳してみておく
Test drive
What you'll learn
- How to create a new Flutter app from a sample template.
サンプルテンプレートから新しいFlutterアプリを作成する方法。 - How to run the new Flutter app.
新しいFlutterアプリの実行方法。 - How to use "hot reload" after you make changes to the app.
アプリに変更を加えた後に「ホットリロード」を使用する方法。
Guide depends on your IDE
ガイドはあなたのIDEに依存します。
These tasks depend on which integrated development environment (IDE) you use.
これらの作業は、どの統合開発環境(IDE)を使うかによって異なる。
- Option 1 explains how to code with Visual Studio Code and its Flutter extension.
オプション1では、Visual Studio CodeとそのFlutter拡張機能を使ってコーディングする方法を説明する。 - Option 2 explains how to code with Android Studio or IntelliJ IDEA with its Flutter plugin.
オプション2では、Android StudioまたはIntelliJ IDEAのFlutterプラグインを使ってコーディングする方法を説明する。Flutter supports IntelliJ IDEA Community, Educational, and Ultimate editions.
FlutterはIntelliJ IDEA Community版、Educational版、Ultimate版をサポートしています。 - Option 3 explains how to code with an editor of your choice and use the terminal to compile and debug your code.
オプション3では、好きなエディターを使ってコードを書き、ターミナルを使ってコンパイルとデバッグを行う方法を説明する。
Choose your IDE
IDEを選ぶ
Select your preferred IDE for Flutter apps.
Flutterアプリに適したIDEを選択する。
Create your sample Flutter app
- Open the Command Palette.
コマンドパレットを開く。Go to View > Command Palette or press + Shift + P.
表示 > コマンドパレットに移動するか、+ Shift + Pを押します。 - Type
flutterとタイプする
fluter - Select the Flutter: New Project.
Flutter: New Projectを選択する - When prompted for Which Flutter Project, select Application.
どのFlutterプロジェクトかを聞かれたら、Applicationを選択する。 - Create or select the parent directory for the new project folder.
新しいプロジェクトフォルダの親ディレクトリを作成または選択します。 - When prompted for a Project Name, enter
test_drive.
プロジェクト名の入力を求められたら、test_driveと入力する。 - Press Enter.
Enterを押す。 - Wait for project creation to complete.
プロジェクトの作成が完了するまで待つ。 - Open the
libdirectory, then themain.dart.
libディレクトリを開き、次にmain.dartを開く。To learn what each code block does, check out the comments in that Dart file.
各コードブロックが何をするのかを知るには、そのDartファイルのコメントをチェックしてほしい。
The previous commands create a Flutter project directory called test_drive that contains a simple demo app that uses Material Components.
先ほどのコマンドでtest_driveというFlutterプロジェクトディレクトリが作成され、Material Componentsを使ったシンプルなデモアプリが含まれる。
Run your sample Flutter app
サンプルのFlutterアプリを実行する
Run your example application on your desktop platform, in the Chrome web browser, in an iOS simulator, or Android emulator.
デスクトップ・プラットフォーム、Chromeウェブ・ブラウザ、iOSシミュレータ、Androidエミュレータでサンプル・アプリケーションを実行してください。
- Open the Command Palette.
コマンドパレットを開く。Go to View > Command Palette or press + Shift + P. - Type
flutter

fluter
とタイプする - Select the Flutter: Select Device.
Flutter: New Projectを選択するIf no devices are running, this command prompts you to enable a device.
実行中のデバイスがない場合、このコマンドはデバイスを有効にするよう促します。 - Select a target device from Select Device prompt.
Select Deviceプロンプトからターゲットデバイスを選択します。 - After you select a target, start the app. Go to Run > Start Debugging or press F5.
ターゲットを選択したら、アプリを起動する。Run > Start Debuggingに進むか、F5を押す。 - Wait for the app to launch.
アプリが起動するのを待つ。You can watch the launch progress in the Debug Console view.
起動の進行状況は、デバッグコンソールビューで確認できます。
After the app build completes, your device displays your app.
アプリのビルドが完了すると、デバイスにアプリが表示されます。

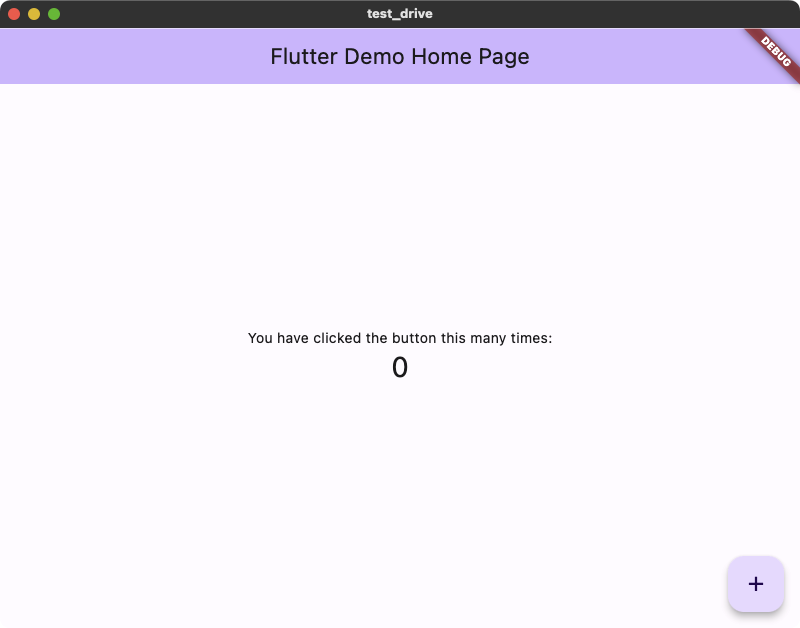
スターターアプリ
Try hot reload
ホットリロードを試す
Flutter offers a fast development cycle with Stateful Hot Reload, the ability to reload the code of a live running app without restarting or losing app state.
Flutterは、ステートフルホットリロード(Stateful Hot Reload)、つまりアプリを再起動したりアプリの状態を失ったりすることなく、実行中のアプリのコードをリロードする機能によって、高速な開発サイクルを提供します。
You can change your app source code, run the hot reload command in VS Code, and see the change in your target device.
アプリのソースコードを変更し、VS Codeでホット・リロード・コマンドを実行すれば、ターゲット・デバイスで変更を確認できる。
- Open
lib/main.dart.
lib/main.dartを開く。 - Change the word
pushedtoclickedin the following string. It is on line 109 of themain.dartfile as of this writing.
以下の文字列のpushedをclickedに変更する。これを書いている時点では、main.dartファイルの109行目にある。Original New 'You have pushed the button this many times:' ,'You have clicked the button this many times:' , - Save your changes: invoke Save All, or click Hot Reload
 .
.
Your app updates the string as you watch.
変更を保存する:すべて保存を実行するか、ホットリロードをクリックします。