2023,江端さんの技術メモ

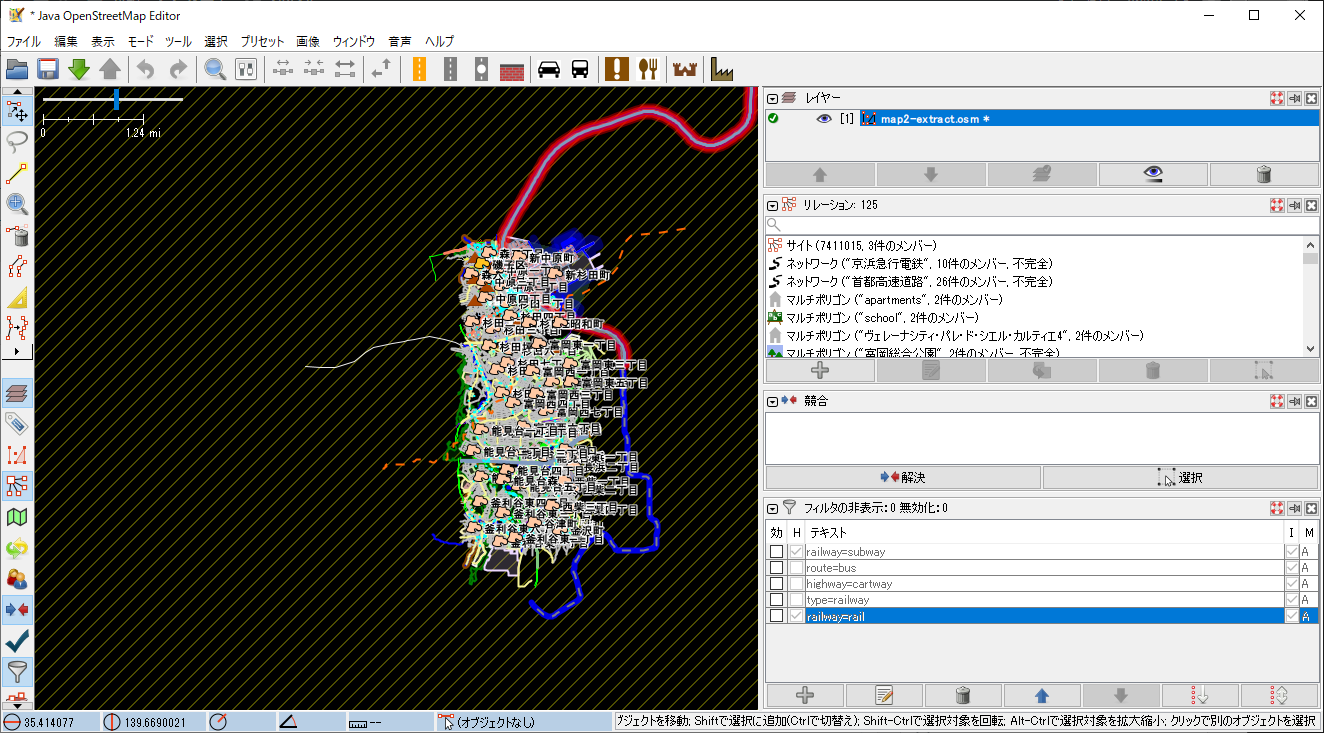
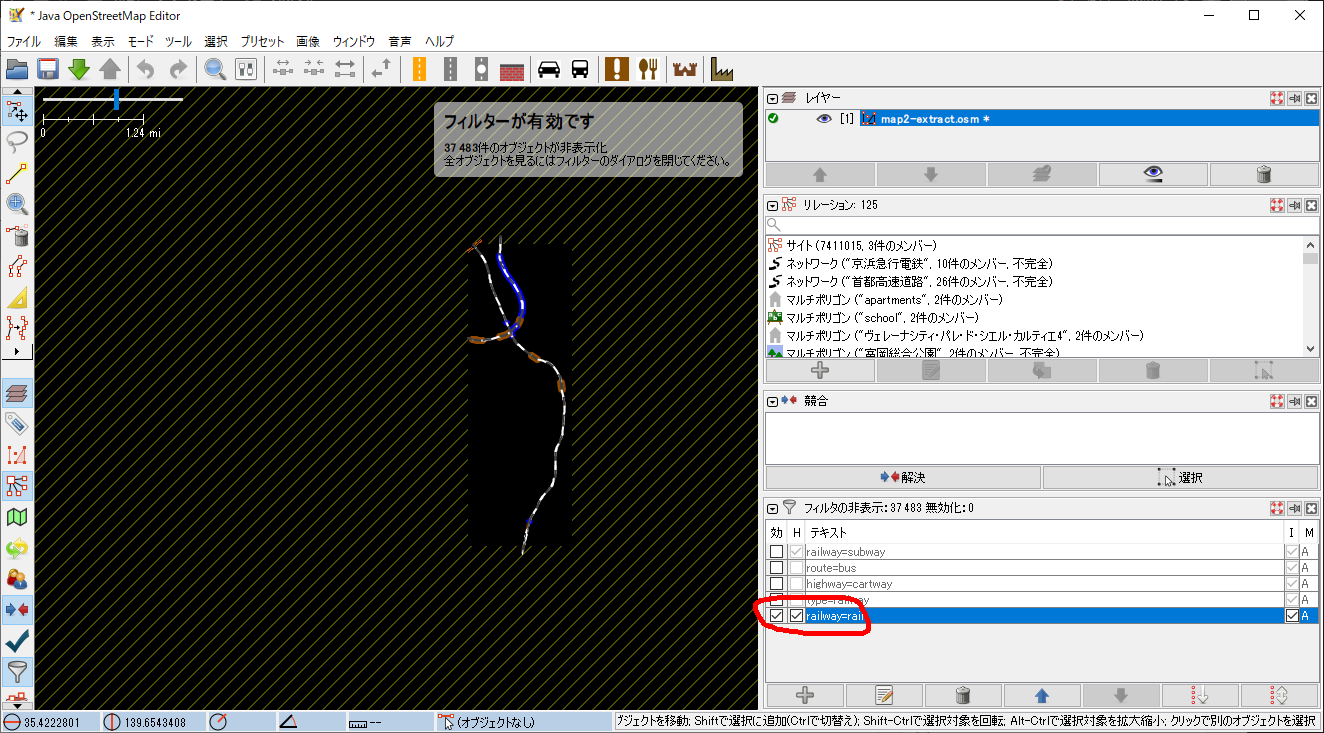
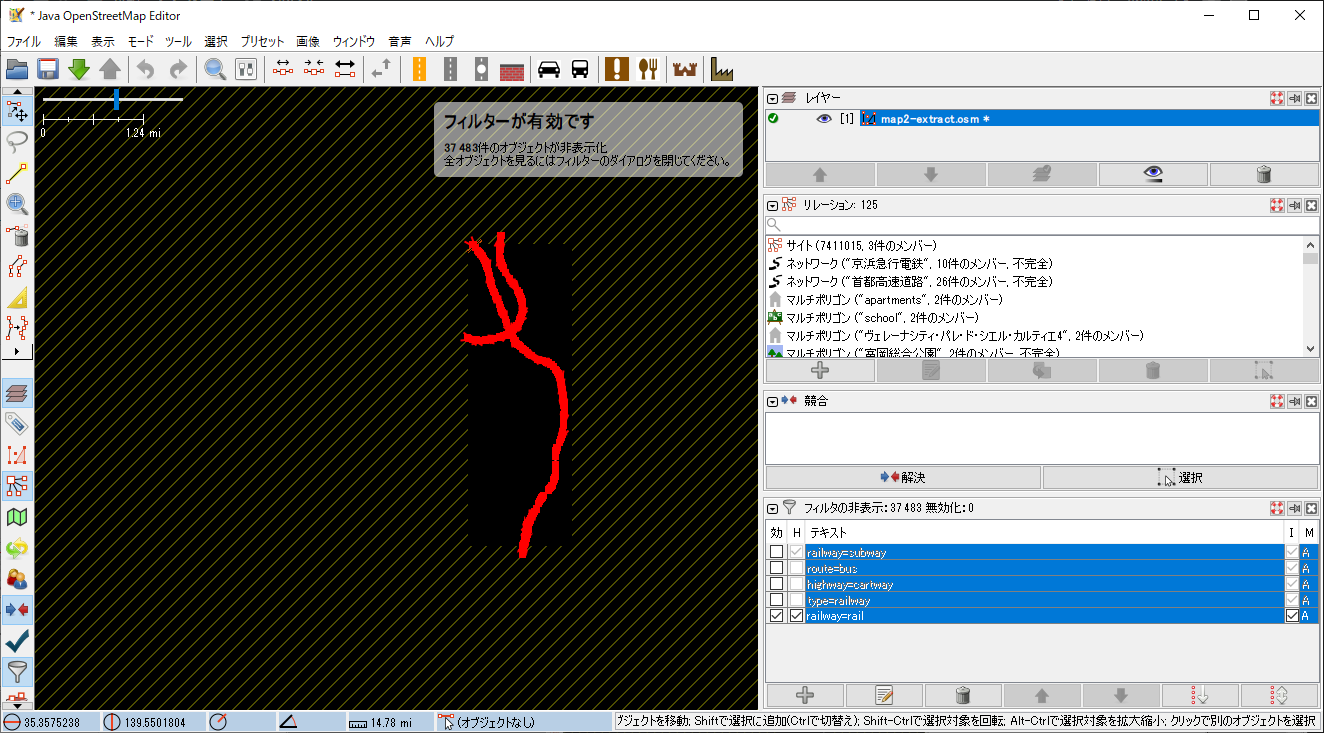
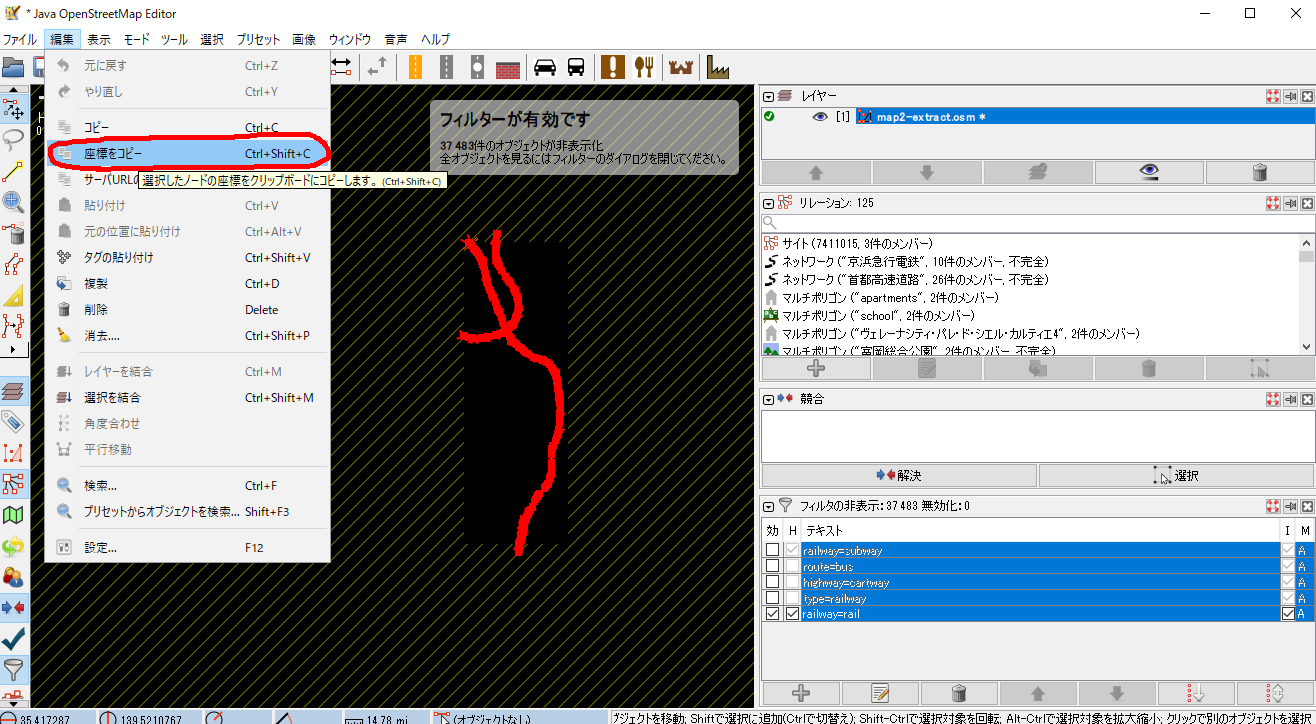
JOSMで地下鉄の情報だけをosm形式で取り出したい時(未完成)

JOSMでバス停が取り出せる。これを使って、バス路線を自力で作れそう。

拡大すると、こんな感じ

バス停専用の高架を作って、一般道に繋ぐイメージにすることで、バスを専用路線扱いできる。コスト値を変えて、ダイクストラを実施すれば、バスが選ばたり、逆に忌避させたりすることもできるはず。

以上

2023,江端さんの技術メモ

JOSM (Java OpenStreetMap Editor) を用いて複数 OSM ファイルのマージ

Step 1. マージするOSMを選択

Step 2.  JOSMにドラッグ

Step 3. ファイルをマージ

Step 4. 「レイヤを結合する」を選択する(この段階ではセーブされないので、どのレイヤでもいい)

Step 5. 路線を結合したい点を、同じ番号にするなどの加工を行う

以上

2023,江端さんの技術メモ

神奈川県のバスルートのsharpファイルをpostGISにインポートする

をやってから、試しに、1つのバスルートのみを、ここから取り出して、

select文の出力をローカルのテキストで保存する方法

とした後、このプログラムで、なんちゃってosmファイルを作成する。

/* 


前処理
bus_route=# \o output.txt
bus_route=# select ST_AsText(geom) from bus_route where gid = 1488;
bus_route=# \o

f:/しゅらばしゅう/有吉先生データ/Transfer(2018)/N07-11_14_GML/
sharp2osm.go

>go run sharp2osm.go ichi-61.txt 20000 > ichi-61.osm

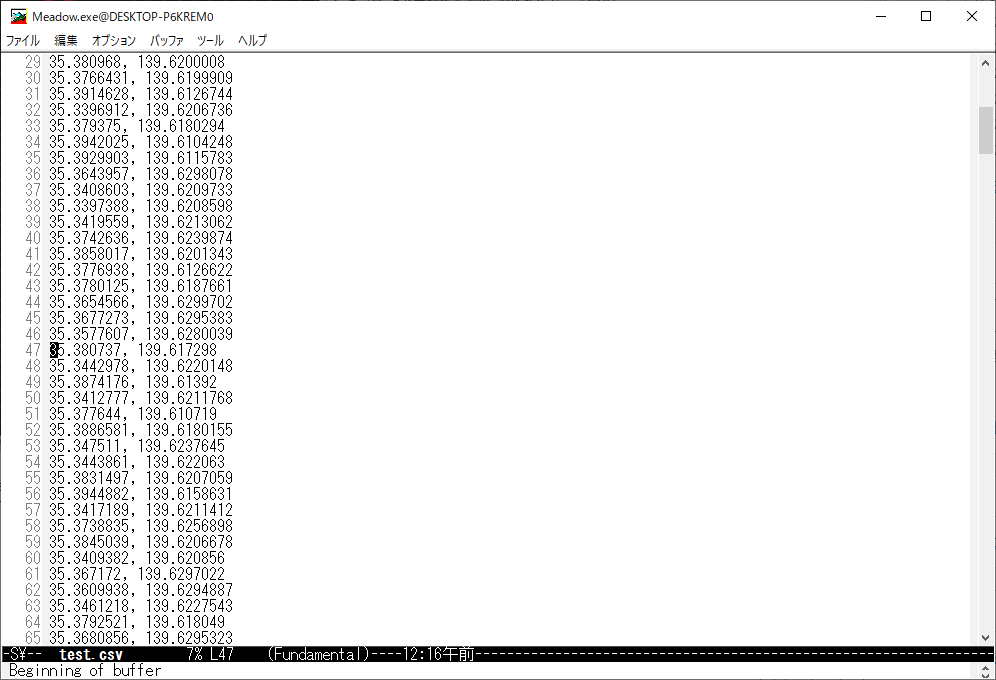
ichi-61.txtの形式は、以下の感じ

MultiLineStringM ((139.53708861000001207 35.55222889000000208 0, 139.5370455599999957 35.55227666999999769 0, 139.53649416999999744 35.55299193999999829 0, 139.53643777999999998 35.55307056000000188 0, 139.53636917000000039 35.55315000000000225 0, 139.53559056000000282 35.55415305999999731 0, 139.53552528000000166 35.5542358300000032 0, 139.53547499999999104 35.5543083299999978 0, 139.53475943999998776 35.55520943999999872 0, 139.53468250000000239 35.55528333000000174 0, 139.53507944000000407 35.55541443999999984 0, 139.53518278000001374 35.55545389000000256 0, 139.53539638999998829 35.55552139000000267 0, 139.53575471999999991 35.55565666999999763 0, 139.5360763600000098 35.55570185999999921 0))

*/

package main

import (
	"bufio"
	"fmt"
	"os"
	"strings"
	"strconv"
)

func main() {

	// ファイルを開く
	filePath := "output.txt" // 実際のファイルパスに置き換えてください
	file, err := os.Open(filePath)
	if err != nil {
		fmt.Println("ファイルを開けませんでした:", err)
		return
	}
	defer file.Close()


	fmt.Println("<?xml version='1.0' encoding='UTF-8'?>")
	fmt.Println("<osm version='0.6' generator='JOSM'>")

	node_id := 20000

	// ファイルを行ごとに読み込み、カンマとスペースでパースする
	scanner := bufio.NewScanner(file)
	for scanner.Scan() {
		line_org := scanner.Text()
		prefix := " MULTILINESTRING M ((" // 切り捨てる最初の文字列
		line := strings.TrimPrefix(line_org, prefix)

		fields := strings.FieldsFunc(line, func(r rune) bool {
			return r == ',' || r == ' ' 
		})


		var lon,lat float64


		// 取得したフィールドを表示
		for i, field := range fields {

			num, _ := strconv.ParseFloat(field, 64)
			// fmt.Println(i, i%3, num)
			
			if i % 3 == 0 {
			   lon = num
			}else if i % 3 == 1{
			   lat = num
			} else if i % 3 == 2{
			   fmt.Printf("  <node id='%d' visible='true'  version='5' lat='%f' lon='%f' />\n", node_id, lat, lon) 
			   node_id++
			   //fmt.Println(lat,",",lon)
			}	

		}
	}

	fmt.Println("  <way id='180000' visible='true' version='5'>")	

	for i:=20000; i<node_id; i++{
		fmt.Printf("    <nd ref='%d' />\n",i) 
	}
	fmt.Printf("        <tag k='highway' v='residential' />")
		
	fmt.Println("  </way>")	
	fmt.Println("</osm>")	


	if err := scanner.Err(); err != nil {
		fmt.Println("ファイル読み込みエラー:", err)
	}
}

で、以下のようなファイルができる。

<?xml version='1.0' encoding='UTF-8'?>
<osm version='0.6' generator='JOSM'>
<node id='20000' visible='true' version='5' lat='35.560912' lon='139.606144' />
<node id='20001' visible='true' version='5' lat='35.561252' lon='139.606062' />
<node id='20002' visible='true' version='5' lat='35.561646' lon='139.605835' />
<node id='20003' visible='true' version='5' lat='35.561736' lon='139.60575' />
(中略)
<way id='180000' visible='true' version='5'>
<nd ref='20000' />
<nd ref='20001' />
<nd ref='20002' />
<nd ref='20003' />
(中略)
<nd ref='20189' />
<tag k='highway' v='residential' />
</way>
</osm>

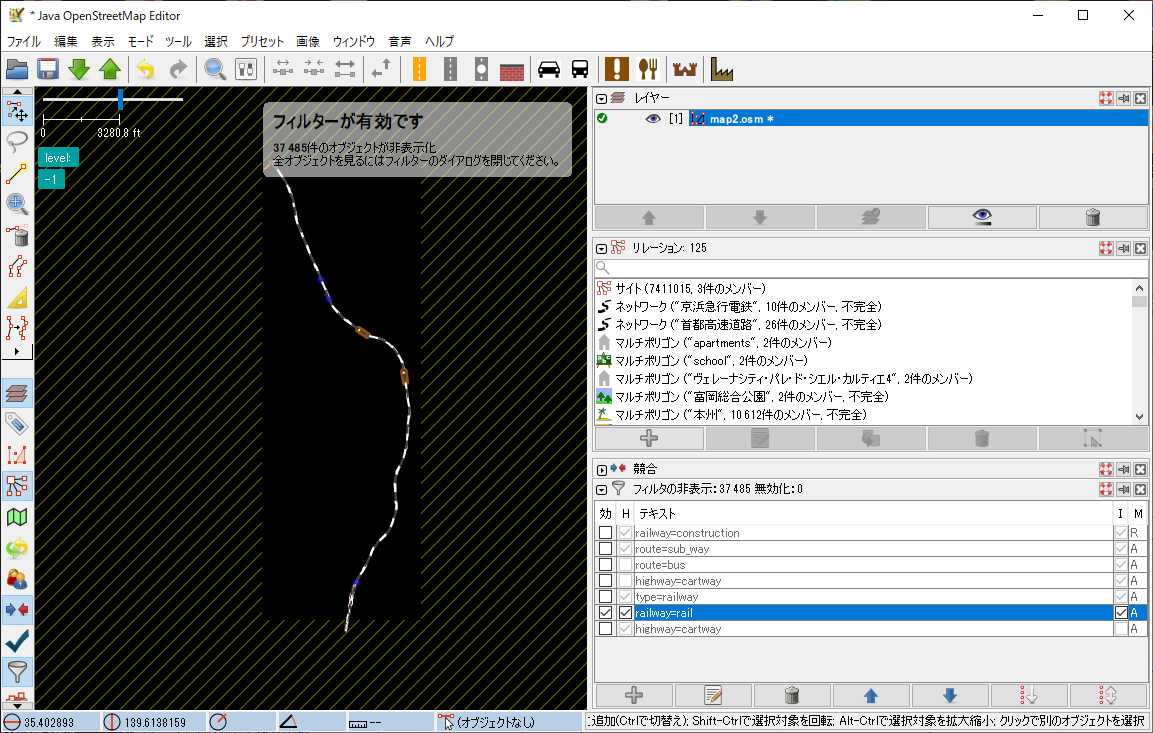
JOSMでの表示

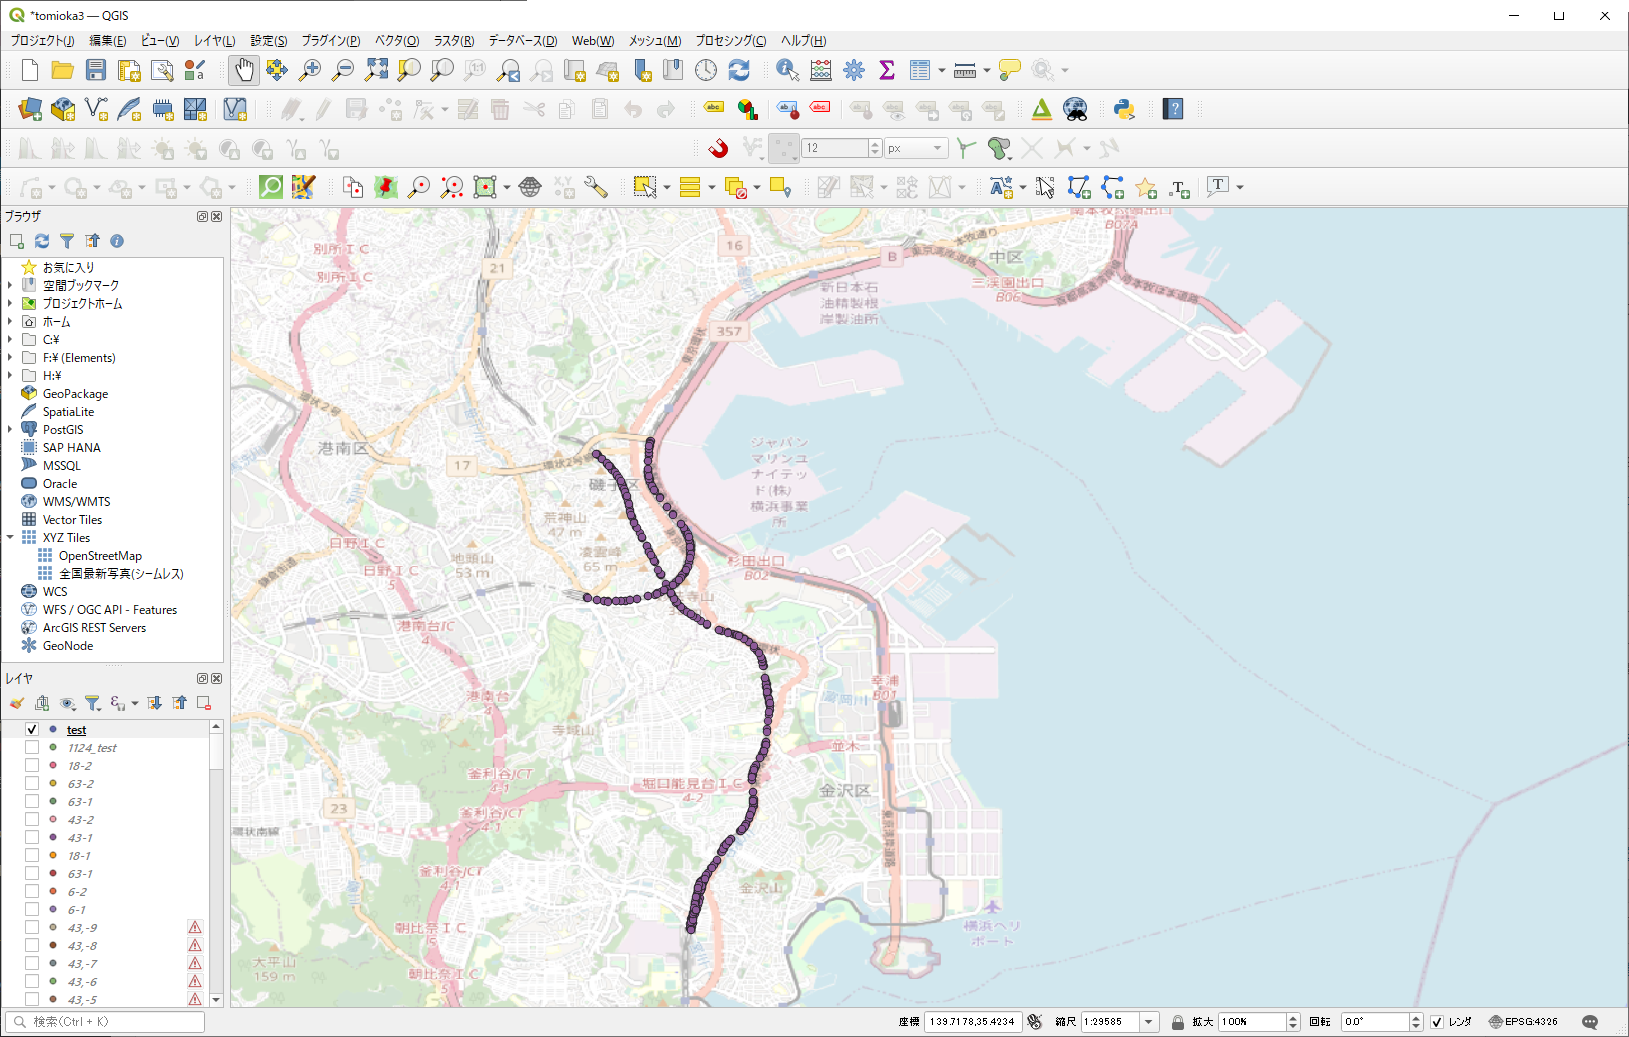
QGISでの表示

とりあえず、忘れないうちにメモを作成しました。

以上

2023,江端さんの技術メモ

bus_route=# \o output.txt
bus_route=# select * from bus_route where gid = 1488;
bus_route=# \o

psqlを立ち上げたディレクトリにできている


2023,江端さんの技術メモ

https://nlftp.mlit.go.jp/ksj/gml/datalist/KsjTmplt-N07.html

アンケートに答える

ダウンロードしたものを解凍すると、以下のファイルが出てくる

で、shp2pgsqlを使って、sqlファイルを作る

F:\N07-11_14_GML>shp2pgsql -W cp932 -D -I -s 4612 F:\N07-11_14_GML\N07-11_14.shp bus_route > F:\N07-11_14_GML\bus_route.sql

bus_route.sqlの内容はこんな感じ

最初に、データベースを作っておく。

C:\Users\ebata>psql -U postgres -h 192.168.0.23 -p 15432
Password for user postgres:
psql (13.4, server 13.3 (Debian 13.3-1.pgdg100+1))
Type "help" for help.

tsuzuki_db=# create database bus_route;
CREATE DATABASE
tsuzuki_db=# \c bus_route
psql (13.4, server 13.3 (Debian 13.3-1.pgdg100+1))
You are now connected to database "bus_route" as user "postgres".
bus_route=# create extension postgis;
CREATE EXTENSION
bus_route=# create extension pgrouting;
CREATE EXTENSION

bus_route=# \dt
List of relations
Schema | Name | Type | Owner
--------+-----------------+-------+----------
public | spatial_ref_sys | table | postgres
(1 row)

と、この状態で、

psql -U postgres -h 192.168.0.23 -p 15432 -d bus_route -f "bus_route.sql"

でインポートを実施。

bus_route=# \dt
List of relations
Schema | Name | Type | Owner
--------+-----------------+-------+----------
public | bus_route | table | postgres
public | spatial_ref_sys | table | postgres
(2 rows)

テーブルbus_routeが追加されている。

QGIS3で見るとこんな感じに見える。

データベースへのアクセス方法は、図中参考のこと。

以上


2023,江端さんの技術メモ

https://github.com/BtbN/FFmpeg-Builds/releases から、

をダウンロードして、解凍して、binにパスを通して、

カメラ繋げて、以下のコマンドを投入する。

C:\Users\ebata>ffplay -i rtsp://192.168.0.2/ONVIF/Streaming/channels/3

と、こんな感じで、動画が出てくる。

C:\Users\ebata>ffprobe -v error -show_entries stream=codec_type,width,height -i rtsp://192.168.0.2/ONVIF/Streaming/channels/3
[STREAM]
codec_type=video
width=640
height=360
[/STREAM]
[STREAM]
codec_type=audio
[/STREAM]
[STREAM]
codec_type=data
[/STREAM]

C:\Users\ebata>ffprobe -v error -show_entries stream=codec_type,width,height -i rtsp://192.168.0.2/ONVIF/Streaming/channels/0
[h264 @ 00000168d79bc9c0] left block unavailable for requested intra4x4 mode -1
[h264 @ 00000168d79bc9c0] error while decoding MB 0 27, bytestream 59839
[STREAM]
codec_type=video
width=1920
height=1080
[/STREAM]
[STREAM]
codec_type=audio
[/STREAM]
[STREAM]
codec_type=data
[/STREAM]


C:\Users\ebata>ffprobe -v error -show_format -show_streams -i rtsp://192.168.0.2/ONVIF/Streaming/channels/3
[STREAM]
index=0
codec_name=h264
codec_long_name=H.264 / AVC / MPEG-4 AVC / MPEG-4 part 10
profile=High
codec_type=video
codec_tag_string=[0][0][0][0]
codec_tag=0x0000
width=640
height=360
coded_width=640
coded_height=360
closed_captions=0
film_grain=0
has_b_frames=0
sample_aspect_ratio=1:1
display_aspect_ratio=16:9
pix_fmt=yuv420p
level=31
color_range=tv
color_space=bt709
color_transfer=bt709
color_primaries=bt709
chroma_location=left
field_order=progressive
refs=1
is_avc=false
nal_length_size=0
id=N/A
r_frame_rate=5/1
avg_frame_rate=5/1
time_base=1/90000
start_pts=17635
start_time=0.195944
duration_ts=N/A
duration=N/A
bit_rate=N/A
max_bit_rate=N/A
bits_per_raw_sample=8
nb_frames=N/A
nb_read_frames=N/A
nb_read_packets=N/A
extradata_size=58
DISPOSITION:default=0
DISPOSITION:dub=0
DISPOSITION:original=0
DISPOSITION:comment=0
DISPOSITION:lyrics=0
DISPOSITION:karaoke=0
DISPOSITION:forced=0
DISPOSITION:hearing_impaired=0
DISPOSITION:visual_impaired=0
DISPOSITION:clean_effects=0
DISPOSITION:attached_pic=0
DISPOSITION:timed_thumbnails=0
DISPOSITION:captions=0
DISPOSITION:descriptions=0
DISPOSITION:metadata=0
DISPOSITION:dependent=0
DISPOSITION:still_image=0
[/STREAM]
[STREAM]
index=1
codec_name=pcm_mulaw
codec_long_name=PCM mu-law / G.711 mu-law
profile=unknown
codec_type=audio
codec_tag_string=[0][0][0][0]
codec_tag=0x0000
sample_fmt=s16
sample_rate=8000
channels=1
channel_layout=unknown
bits_per_sample=8
initial_padding=0
id=N/A
r_frame_rate=0/0
avg_frame_rate=0/0
time_base=1/8000
start_pts=0
start_time=0.000000
duration_ts=N/A
duration=N/A
bit_rate=64000
max_bit_rate=N/A
bits_per_raw_sample=N/A
nb_frames=N/A
nb_read_frames=N/A
nb_read_packets=N/A
DISPOSITION:default=0
DISPOSITION:dub=0
DISPOSITION:original=0
DISPOSITION:comment=0
DISPOSITION:lyrics=0
DISPOSITION:karaoke=0
DISPOSITION:forced=0
DISPOSITION:hearing_impaired=0
DISPOSITION:visual_impaired=0
DISPOSITION:clean_effects=0
DISPOSITION:attached_pic=0
DISPOSITION:timed_thumbnails=0
DISPOSITION:captions=0
DISPOSITION:descriptions=0
DISPOSITION:metadata=0
DISPOSITION:dependent=0
DISPOSITION:still_image=0
[/STREAM]
[STREAM]
index=2
codec_name=unknown
codec_long_name=unknown
profile=unknown
codec_type=data
codec_tag_string=[0][0][0][0]
codec_tag=0x0000
id=N/A
r_frame_rate=0/0
avg_frame_rate=0/0
time_base=1/90000
start_pts=0
start_time=0.000000
duration_ts=N/A
duration=N/A
bit_rate=N/A
max_bit_rate=N/A
bits_per_raw_sample=N/A
nb_frames=N/A
nb_read_frames=N/A
nb_read_packets=N/A
DISPOSITION:default=0
DISPOSITION:dub=0
DISPOSITION:original=0
DISPOSITION:comment=0
DISPOSITION:lyrics=0
DISPOSITION:karaoke=0
DISPOSITION:forced=0
DISPOSITION:hearing_impaired=0
DISPOSITION:visual_impaired=0
DISPOSITION:clean_effects=0
DISPOSITION:attached_pic=0
DISPOSITION:timed_thumbnails=0
DISPOSITION:captions=0
DISPOSITION:descriptions=0
DISPOSITION:metadata=0
DISPOSITION:dependent=0
DISPOSITION:still_image=0
[/STREAM]
[FORMAT]
filename=rtsp://192.168.0.2/ONVIF/Streaming/channels/3
nb_streams=3
nb_programs=0
format_name=rtsp
format_long_name=RTSP input
start_time=0.000000
duration=N/A
size=N/A
bit_rate=N/A
probe_score=100
TAG:title=RTSP/RTP stream from HDIPCam
[/FORMAT]

C:\Users\ebata>ffprobe -v error -show_format -show_streams -i rtsp://192.168.0.2/ONVIF/Streaming/channels/0
[STREAM]
index=0
codec_name=h264
codec_long_name=H.264 / AVC / MPEG-4 AVC / MPEG-4 part 10
profile=High
codec_type=video
codec_tag_string=[0][0][0][0]
codec_tag=0x0000
width=1920
height=1080
coded_width=1920
coded_height=1080
closed_captions=0
film_grain=0
has_b_frames=0
sample_aspect_ratio=1:1
display_aspect_ratio=16:9
pix_fmt=yuv420p
level=40
color_range=tv
color_space=bt709
color_transfer=bt709
color_primaries=bt709
chroma_location=left
field_order=progressive
refs=1
is_avc=false
nal_length_size=0
id=N/A
r_frame_rate=30/1
avg_frame_rate=30/1
time_base=1/90000
start_pts=4354
start_time=0.048378
duration_ts=N/A
duration=N/A
bit_rate=N/A
max_bit_rate=N/A
bits_per_raw_sample=8
nb_frames=N/A
nb_read_frames=N/A
nb_read_packets=N/A
extradata_size=61
DISPOSITION:default=0
DISPOSITION:dub=0
DISPOSITION:original=0
DISPOSITION:comment=0
DISPOSITION:lyrics=0
DISPOSITION:karaoke=0
DISPOSITION:forced=0
DISPOSITION:hearing_impaired=0
DISPOSITION:visual_impaired=0
DISPOSITION:clean_effects=0
DISPOSITION:attached_pic=0
DISPOSITION:timed_thumbnails=0
DISPOSITION:captions=0
DISPOSITION:descriptions=0
DISPOSITION:metadata=0
DISPOSITION:dependent=0
DISPOSITION:still_image=0
[/STREAM]
[STREAM]
index=1
codec_name=pcm_mulaw
codec_long_name=PCM mu-law / G.711 mu-law
profile=unknown
codec_type=audio
codec_tag_string=[0][0][0][0]
codec_tag=0x0000
sample_fmt=s16
sample_rate=8000
channels=1
channel_layout=unknown
bits_per_sample=8
initial_padding=0
id=N/A
r_frame_rate=0/0
avg_frame_rate=0/0
time_base=1/8000
start_pts=0
start_time=0.000000
duration_ts=N/A
duration=N/A
bit_rate=64000
max_bit_rate=N/A
bits_per_raw_sample=N/A
nb_frames=N/A
nb_read_frames=N/A
nb_read_packets=N/A
DISPOSITION:default=0
DISPOSITION:dub=0
DISPOSITION:original=0
DISPOSITION:comment=0
DISPOSITION:lyrics=0
DISPOSITION:karaoke=0
DISPOSITION:forced=0
DISPOSITION:hearing_impaired=0
DISPOSITION:visual_impaired=0
DISPOSITION:clean_effects=0
DISPOSITION:attached_pic=0
DISPOSITION:timed_thumbnails=0
DISPOSITION:captions=0
DISPOSITION:descriptions=0
DISPOSITION:metadata=0
DISPOSITION:dependent=0
DISPOSITION:still_image=0
[/STREAM]
[STREAM]
index=2
codec_name=unknown
codec_long_name=unknown
profile=unknown
codec_type=data
codec_tag_string=[0][0][0][0]
codec_tag=0x0000
id=N/A
r_frame_rate=0/0
avg_frame_rate=0/0
time_base=1/90000
start_pts=0
start_time=0.000000
duration_ts=N/A
duration=N/A
bit_rate=N/A
max_bit_rate=N/A
bits_per_raw_sample=N/A
nb_frames=N/A
nb_read_frames=N/A
nb_read_packets=N/A
DISPOSITION:default=0
DISPOSITION:dub=0
DISPOSITION:original=0
DISPOSITION:comment=0
DISPOSITION:lyrics=0
DISPOSITION:karaoke=0
DISPOSITION:forced=0
DISPOSITION:hearing_impaired=0
DISPOSITION:visual_impaired=0
DISPOSITION:clean_effects=0
DISPOSITION:attached_pic=0
DISPOSITION:timed_thumbnails=0
DISPOSITION:captions=0
DISPOSITION:descriptions=0
DISPOSITION:metadata=0
DISPOSITION:dependent=0
DISPOSITION:still_image=0
[/STREAM]
[FORMAT]
filename=rtsp://192.168.0.2/ONVIF/Streaming/channels/0
nb_streams=3
nb_programs=0
format_name=rtsp
format_long_name=RTSP input
start_time=0.000000
duration=N/A
size=N/A
bit_rate=N/A
probe_score=100
TAG:title=RTSP/RTP stream from HDIPCam
[/FORMAT]

ffplayは、これでかなり描画が早くなる。(VLCと同程度になった→ ということは、VLCもフレーム落しをしているんだな、多分)

ffplay -fflags nobuffer -flags low_delay -framedrop -i srt://192.168.1.15:12345

■ffmpegでSRTストリームを10秒間録画する方法

ffmpeg -i "srt://192.168.1.15:12345" -t 10 output.mp4

#3 30/1 max=30 3543KB
#3 10/1 max=10 4529KB
#3 5/1 max=5 


2023,江端さんの技術メモ

ネットワークQoSの計測が必要となったので、古いハブ(GS105E)を復活させています。

C:\Users\ebata\Downloads\ProSAFE_Plus_Utility_V2.7.8

で、ダウンロード&インストール。以下で起動

パスワードに"password"と入力

以下の手続で、ミラーリングポートの設定ができる(はず)

以上

2023,江端さんの技術メモ

今の我が家は、アクセスポイント5、無線ネットワーク2、 有線ネットワーク1(ハブ区分で勘定であれば、10は軽く超える)という、IPネットワークのテストフィールドです。最近、ここにカメラ3台・・・いや、業務用と監視用を入れれば7台か。もうめちゃくちゃです。

そんでもって、できるだけ設定を変更せずに、システムを騙しながら、新しい実験システムを追加するのは、なかなかトリッキーな技が必要となります。

まあ、愚痴はさておき。

今、私の目の前には、設定をすっかり忘れた、TP-LINK / Archer C2300

ここを、細い棒で、10秒以上押し続ける。こうすると、

黄色のポートの方が、192.168.0.1/255.255.255.0が設定されるので、ブラウザから192.168.0.1を入力して、設定画面を出すことができる。

パスワードもリセットさせているので、再設定する必要がある。

現在の設定は、インターネットのポートに、江端家のメインネット192.168.0.*をDHCPで設定して、黄色のポートの方は、192.168.11.1としておいた(それ以外は何も設定しなかった)。

当然、設定後再起動した C2300 は、Webに表示されなくなるので、パソコンのNICを、192.168.11.10として、ブラウザから、192.168.11.1 で再度アクセスして確認する。

機器の裏面に記載されていた、この内容で無線LANの設定をしたら、192.168.11.* のIPアドレスで接続できることを確認した。

以上。

P.S. もう使う予定のないノートPCでも、こういう設定の時にはとても役に立つ(機器と直結すれば、他のネットワークの影響なく設定できるから)

江端家ネットワークのの192.168.0.*は変更できず、かつ、RTSPカメラのデフォルトIPの192.168.0.2を変更したくなくて、色々苦労しています。


RTSPカメラを接続すると、firefoxが動かなくなるという現象がでてきてこまっていたのですが、これは、デフォルトゲートウェイだな、とあたりをつけて、最小作業で構成変更しました。

cam@cam-desktop:~$ more /etc/netplan/99_config.yaml


~
network:
version: 2
renderer: networkd
ethernets:
eth0:
dhcp4: false
addresses:
- 192.168.0.15/24
routes:
- to: default
via: 192.168.0.1
nameservers:
addresses: [192.168.0.1,8.8.8.8]
enx70886b8c8268:
dhcp4: false
addresses:
- 192.168.1.15/24

を、

network:
version: 2
renderer: networkd
ethernets:
eth0:
dhcp4: false
addresses:
- 192.168.0.15/24
enx70886b8c8268:
dhcp4: false
addresses:
- 192.168.1.15/24

wlan0:
dhcp4: false
addresses:
- 192.168.11.15/24
routes:
- to: default
via: 192.168.11.1
nameservers:
addresses: [192.168.11.1,8.8.8.8]

と変更しました。(8.8.8.8は多分不要です)。無線LANも192.168.1.15で固定しました。

$ sudo netplan apply

で設定を有効にします(エラーの場合、エラーの内容が表示されます)。


なお、上記はタブ(空白?)位置が崩れているので、設定する方は十分にタブ(空白?)位置を意識して変更してください。

これで、安定して起動する(?)と思います。
(嘘です。毎日安定して動きません。上記の内容毎日変わっています)


カメラの設定を変えたい時に、こういう手動の技が使えるようです。

192.168.0.2  admin/jvc でアクセスできます。


ところで、ブリッジモードにする場合、何もすることがありません(というか、"できません")

あたりまえなんですけどね、ブリッジモードとは、一言で言うと「ハブ」です。

ですので、装置にIPアドレスの付与なんで必要ないんですよね ―― なんでIPアドレスを設定できないのかで、たっぷり30分は悩んだ。ーーー 私はバカか。ハブにアドレス設定できるかアホ。

ここに結線すると、そのセグメント(e.g 192.168.11.0/255.255.248.0)が、黄色い有線ポートと無線LANに、そのまま拡張されるから。

ちなみに、DHCPとかその他の設定も、ベースとなるセグメントのネットワークの設定に従うだけだから、何もできません。


2023,江端さんの技術メモ

症状:Win32 Disk Imageで作ったラズパイのSDカードのクローンでシステムが起動しない。

Symptom:  RaspBerry PI's SD card replica made with Win32 Disk Image does not boot the system.

ラズパイ SDカード イメージ コピー レプリカ

writable: recovering Journal
writable: Superblock needs-recovery flag is Clear, but Journal has data.
writable: Run Journal anyway
writable: UNEXPECTED INCONSISTENCY; RUN fsck MANUALLY,
(i.e., without -a or -p options)
fsck exited with status code 4
The root filesysten on /dev/mmcblk0p2 requires a manual fsck

BusyBox v1.30.1 (Ubuntu 1:1.30.1-7ubuntu3) built-in shell (ash)
Enter 'help' for a list of built-in commands.
(initramfs) fsck /dev/mmcblk0p2
fsck from util-linux 2.37.2
e2fsck 1.46.5 (30-Dec-2021)
writable: recovering Journal
Superblock needs_recovery flag is clear, but Journal has data.
Run journal anyway<y> yes
fsck.ext4:unable to set superblock flags on writable

writable: **********WARNING: Filesystem still has errors **********
(initramfs)

417512958.jpg

原因判明: マスタの128GBのSDカードが、クローンの128GBのSDカードの容量より、ほんのちょっと大きかった為に、システム全体がフルコピーできなかった(そう言えば、Win32 Disk Imageでそういう警告が出ていた)

Cause discovered: The 128GB SD card in the master was slightly larger than the capacity of the 128GB SD card in the replica, so the entire system could not be fully copied (come to think of it, Win32 Disk Image was giving that warning).

対応方法: Linux のddコマンドとか使えば、対応できそうであることは分かったが、現在、手元にLinuxBoxがない。WSLを使ってでできるかと思ったが、「失敗した」という報告もある。無理するとWindows11 Box壊すかもしれない(研究の内容がパーになりかねない)。

How to do it: I found out I can use Linux's dd command or something like that, but I don't have a Linux box. If I try too hard, I might break my Windows 11 Box (which might ruin my research).

考察: ddコマンド対応は、面倒くさい、時間かかりそう。途中で失敗するとPCの方を壊しそう。

Consideration: dd command support is tedious and time-consuming. If it fails in the process, it might break the PC.

現在対応中: たまたま、256GBのメモリカードがあったので、そっちにイメージをコピー中
(上手くいったら、自腹切って256のカード買う。PC壊すリスク考えれば、全然安い。ただし、ほんのチョットのブロックのために、256GBのメモリカード買うのは、本気で腹立たしいけど)

I have a 256GB memory card, so I'm copying the image.
(If all goes well, I'll buy a 256 card at my own expense, which is cheap considering the risk of breaking my PC. However, it is annoying to buy a 256GB memory card for just a few blocks.)

どのくらい足りないかというと、ほんの0.027%だけ。
How "little" is "just 0.027% short"?

こちら(256Gのクローン)は無事起動を確認しました。
This one (256G clone) was confirmed to boot successfully.


以下試みてみたけど、上手く動かなかったこと
Here's what I tried and it didn't work

起動途中で /dev/sda5: UNEXPECTED INCONSISTENCY; RUN fsck MANUALLY. と出て止まるな

ですが、以下の方法で上手く行きました。
But the following method worked.

Raspberry Pi の 起動OSバックアップで、サイズの違う MicroSDカードにイメージコピーする方法

AOMEI Partition Assistant(無償版)をインストールしました。
I installed AOMEI Partition Assistant (free version).

サイズの違うSDカードでもイメージコピーできるらしいのですが、256G(上記でクローン化に成功したもの)→128Gは、サイズが違い過ぎる、と言われました。
It seems possible to copy images from SD cards of different sizes, but 256G (which I successfully cloned above) -> 128G is too other.

仕方がないので、(壊したら後がないので、あまりいじりたくはないけど)現在稼動中の128Gをマスタとして、クローン作ることにしました。
I had no choice but to make a clone using the 128G currently in operation as the master (although I don't want to mess with it too much because if I break it, there is no way to fix it).

左側がマスタ、右側がクローン。右側のSDカードリーダは、ラズパイキットの中に含まれていました(助かりました)。
The left side is the master, and the right side is the clone. The SD card reader on the right side was included in the Raspi kit (thank goodness).

いつまで経っても終わらないので、上記の「全ての処理が完了した後にPCを自動でシャットダウンします」にチェックを入れて、昨夜はそのまま寝ました。
It took forever to finish, so I checked the "Automatically shut down the PC after all processing is complete" checkbox above and went straight to bed last night.

今朝、新しく作ったSDカードを使ってラズパイ立ち上げたら、無事起動しました。
This morning, I started Raspi using the newly created SD card, which booted up fine.

これで、256Gのカードを自腹で買う必要がなくなり、ほっとしています。
I am relieved that I no longer have to buy a 256G card alone.

以上