2020/11,江端さんの技術メモ

「無理せんと、リバースプロキシ(nginx)使えば?」

で、nginxで、外向きにはhttps, 内側はhttpという nginx.confを作りました。

今回は、nginxがdockerのコンテナですでに稼動中のプログラムで、これを試してみました。

まず、docker-compose.ymlですが、まず、docker-compose.ymlと同じディレクトリに、algo.crtとalgo.keyを放り込んでおいて、portsとvolumesを以下のように変更します。

(前略)
nginx:
    image: nginx:1.15-alpine
    ports:
      - "80:80"    ←ここ      
      - "443:443"   ←ここ      
    links:
      - app:app
    volumes:
      - "./nginx.conf:/etc/nginx/conf.d/default.conf"
      - "./algo.crt:/etc/nginx/conf.d/algo.crt"  ←ここ  
      - "./algo.key:/etc/nginx/conf.d/algo.key"  ←ここ  

portsは、"443:80"と記載するのが正解じゃないかなーと思うのですが、上手く動かなかったので、理由は不明ですが上記のように記載しました。

最後の2行ですが、これはnginxのdockerのコンポーネントの中に強制的にリンクするものらしいのです。少なくとも、dockerのコンポーネントの中に、/etc/nginx/conf.d/ は存在しているようなので、もう適当に、そこにリンクを張ることにしました。(いや、"docker container exec -it nginx_1 sh "等で、コンテナに入って確認すれば良いですが、なんか上手く入れないことがありましてですね)

また、docker-compose.ymlと同じディレクトリに(最初から)入っている、nginx.confを以下のよう改造します。

server { 
 listen 80 default_server;  ←ここ   listen [::]:80 default_server;  ←ここ   return 301 https://$host$request_uri;  ←ここ   } server {  # listen 80 default_server; # listen [::]:80 default_server; listen 443; ←ここ server_name localhost; ←ここ ssl on; ←ここ ssl_certificate /etc/nginx/conf.d/algo.crt; ←ここ # https://wp.kobore.net/2020/09/post-1124/で作ったもの ssl_certificate_key /etc/nginx/conf.d/algo.key; ←ここ # 同上  client_max_body_size 1M; root /go/hitachi_ride_hailing_go/static; # これが良く分からんのだが (app_1の方のディレクトリみたいなんだよなぁ)  location / { index index.html index.htm; proxy_pass_header Server; proxy_set_header Host $http_host; proxy_redirect off; proxy_set_header X-Real-IP $remote_addr; proxy_set_header X-Scheme $scheme; if (!-f $request_filename) { proxy_pass http://app:8000; } } location /ws { proxy_pass http://app:8000; proxy_http_version 1.1; proxy_set_header Upgrade $http_upgrade; proxy_set_header Connection "upgrade"; proxy_set_header Host $http_host; proxy_set_header X-Real-IP $remote_addr; proxy_set_header X-Forwarded-For $proxy_add_x_forwarded_for; proxy_set_header X-Forwarded-Proto $scheme; proxy_set_header X-Frame-Options SAMEORIGIN; # リバースプロキシするサーバーから応答が無くとも、接続を切断しない上限の秒数 # http://zaiste.net/2014/12/nginx_websockets_proxy_for_nodejs/ proxy_read_timeout 86400; } }

なんだか分からんけど、太線(←ここ)の所を直したら、https://で通信できるようになったみたいです。

(多分、静的なhtmlファイルの表示だけなら問題はないでしょう)。

あ、忘れていましたが、

JSONのデータを直接受けるhtmlファイルを作成している途中の件

の問題も発生するようなので、面倒なら、"Cross Domain - CORS"を起動しておくと良いでしょう(終了したら取り外しておかないと、Twitterで通信障害「"問題が発生しました" “やりなおす"」が発生するので注意のこと)

ただ、私が現状、https化を試みているプログラムは、まだ問題が残っていて、全部は動いていません。
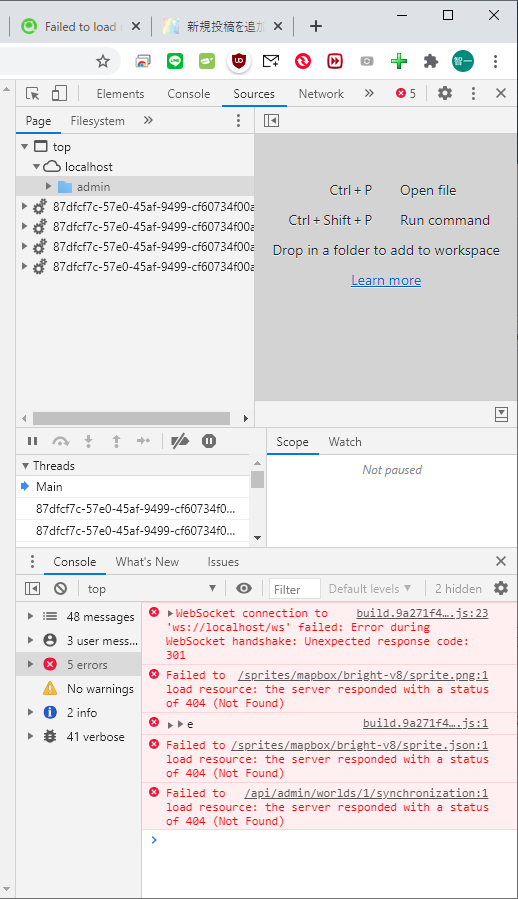
 

build.9a271f4.js:23 WebSocket connection to 'ws://localhost/ws' failed: Error during WebSocket handshake: Unexpected response code: 301
value @ build.9a271f4.js:23

の方は直接、ws:// → wss://に 書き換えたりとかやっていんだけど、上手く動かないみたいです。

=======

翌日、動いていました。

こういう原因が分からない起動も、厄介です。

2020/11,江端さんの技術メモ

Dockerを使っていて、このメッセージにどれだけ苦しめられたことか分からない。

で、世界中の人も困っているようである。

コードにトレースログを仕込んでも、どうもコードではない部分で発生しているらしくて、手がつけられなかったが、調べている内に、こんなことが分かってきた。

  1. Dockerの中にデフォルトに入っているコンテナ間名前解決に関するアドレスらしい
  2. PostgreSQLに関する接続に関するところで発生るうことが多いらしい
  3. で、試しに、docker-compose.yml の"db:"に関わるところに、3行ほど追加してみた(最近濫用している、セキュリティ無視の接続の呪文)
    db:
    image: postgis-pgrouting:latest
    build:
    context: docker/postgis-pgrouting
    expose:
    - "5432"
    ports:
    - "15432:5432"
    volumes:
    - data
    - ./:/hitachi_ride_hailing_go
    environment:
    POSTGRES_HOST_AUTH_METHOD: 'trust'
    POSTGRES_PASSWORD: 'postgres'

そうしたら、いきなり、"dial tcp: lookup db on 127.0.0.11:53: no such host exit" が出てこなくなった。

理由は不明ですし、たまたまかもしれないけど、直ったので、それで良しとします。


2020/11,江端さんの技術メモ

2年前のコードをAWS Lightsailに乗せられないか、docker compose up -d  を試してみたところ、変なところでエラーが出てきた。

go build cmd/server/main.go

と打ち込んでみたら

というところで、引掛っていることが分かった。

原因をググってみた「メモリ不足」。

最低でも1G用意しろ、って書いてあった。

Amazon Lightsailの一番安いやつは、512MBだった。

まあ、今時、ノートPCだって、4G搭載しているからなー、これはないかなー 。

しかし、搭載を断念するのも残念だしなー、安全を考えると2GBは欲しいしなー ・・・でも、10ドル/月かぁ。

ちょっと考えよう。

Lightsail のインスタンスのスケールアップ

(後日談) 1MBのメモリを持つ、5$/月 の インスタンスにスケールアップして、docker compose up -d を通しました。

# いや、実装に成功していたラズパイのメモリが1GBだったので、多分大丈夫だろうと踏みました。

―― が、コンテナが起動していないので、ここからが勝負です。


2020/11,江端さんの技術メモ

地図データの入った PostgreSQL + postGIS サーバ を関係者に配るために、Docker containerのイメージを公開する(サーバ構築手順書を作成するのが面倒だから)

1.コンテナイメージの確認

C:\Users\ebata>docker container ls
CONTAINER ID IMAGE COMMAND CREATED STATUS PORTS NAMES
6432e639f678 postgis-pgrouting:latest "docker-entrypoint.s…" 3 months ago Up 6 hours 0.0.0.0:15432->5432/tcp toyosu_db_1

2.コンテナイメージのパッキング(commit)

C:\Users\ebata>docker commit 6432e639f678 tommurphy/toyosu_db_1
sha256:c7a1a0537fbe24d0c1371264cbd83e620a09e2ec5c328b5fbb42efb0e9454f8e

3. dockerへのログイン

C:\Users\ebata>docker login -u tommurphy
Password:
Login Succeeded

4. 外部への公開

C:\Users\ebata>docker push tommurphy/toyosu_db_1
The push refers to repository [docker.io/tommurphy/toyosu_db_1]
fcc5c725337c: Layer already exists             

fcc5c725337c: Layer already exists
a3994f456ccb: Layer already exists
.....
latest: digest: sha256:27a46f90aa1c7c9f9b5fa92877d22156144b882ba15ba4e04fe0e4fe2cb4af24 size: 4497

5. 確認

https://hub.docker.com/にアクセス

5. 相手側への連絡

「dockerをインストールしたマシンで、"docker pull tommurphy/toyosu_db_1" とコマンド投入しろ」

「で、そのあと、$ docker run -it tommurphy/toyosu_db_1 bash とコマンド投入しろ」


と連絡する。

(とりあえず、Windows10で作ったイメージを、Amazon Lightsailの ubuntu20.04に入れることまでは成功した。動くかどうかは不明)

→ ダメ。データベースすっからかんのコンテナができた。もうちょっと嵌る必要があるなぁ

というか、そもそもDockerコンテナとはそういうものらしい("docker" "postgresql" "永続化"、あたりでググってみる)

現在、PostgreSQLをデータごとDockerコンテナ化するを読んでいる。


2020/11,江端さんの技術メモ

私が使っているQGIS3の地図と地物情報を、先方に送りたいのですが、先方に「DB構築してくれ」とは言えない場合があります(というか、殆どの場合がそうだろう)。

# で、今、実際にそんな状況になっている。

最初、qgzファイルを送付すれば足る、とか思っていたのですが、甘かったようです(qgzファイルはプロジェクト情報しか送付できない)

で、QGIS3を色々触っているうちに、なんかファイルができたような気がするので、自分用のメモとして残しておきます。

以上(現在、先方の成否報告待ち)。

キーワード:gpkg QGIS3 地物情報 先方にメールで送付


2020/11,未分類,江端さんの技術メモ

以下、自分用のメモのみ

AWS  Lightsailにdockerのインストールまで成功

PostgreSQLのインストールも成功したと思う

が、ここから嵌り始める。

ca_sim=# create extension postgis;

^C^CCancel request sent
Cancel request sent
ERROR: canceling statement due to user request
server closed the connection unexpectedly
This probably means the server terminated abnormally
before or while processing the request.
The connection to the server was lost. Attempting reset: Failed.
!>

が出てきて、

サーバ側に
2020-11-04 12:52:16.858 UTC [51] ERROR: canceling statement due to user request
2020-11-04 12:52:16.858 UTC [51] STATEMENT: create extension postgis;
2020-11-04 12:53:53.365 UTC [1] LOG: server process (PID 51) was terminated by signal 9: Killed
2020-11-04 12:53:53.365 UTC [1] DETAIL: Failed process was running: create extension postgis;
2020-11-04 12:53:53.365 UTC [1] LOG: terminating any other active server processes
2020-11-04 12:53:53.367 UTC [25] WARNING: terminating connection because of crash of another server process
2020-11-04 12:53:53.367 UTC [25] DETAIL: The postmaster has commanded this server process to roll back the current transaction and exit, because another server process exited abnormally and possibly corrupted shared memory.
2020-11-04 12:53:53.367 UTC [25] HINT: In a moment you should be able to reconnect to the database and repeat your command.
2020-11-04 12:53:53.371 UTC [53] WARNING: terminating connection because of crash of another server process
2020-11-04 12:53:53.371 UTC [53] DETAIL: The postmaster has commanded this server process to roll back the current transaction and exit, because another server process exited abnormally and possibly corrupted shared memory.
2020-11-04 12:53:53.371 UTC [53] HINT: In a moment you should be able to reconnect to the database and repeat your command.
2020-11-04 12:53:53.372 UTC [56] WARNING: terminating connection because of crash of another server process
2020-11-04 12:53:53.372 UTC [56] DETAIL: The postmaster has commanded this server process to roll back the current transaction and exit, because another server process exited abnormally and possibly corrupted shared memory.
2020-11-04 12:53:53.372 UTC [56] HINT: In a moment you should be able to reconnect to the database and repeat your command.
2020-11-04 12:53:53.516 UTC [1] LOG: all server processes terminated; reinitializing
2020-11-04 12:53:53.535 UTC [58] FATAL: the database system is in recovery mode
2020-11-04 12:53:53.538 UTC [57] LOG: database system was interrupted; last known up at 2020-11-04 12:47:18 UTC
2020-11-04 12:53:53.607 UTC [57] LOG: database system was not properly shut down; automatic recovery in progress
2020-11-04 12:53:53.613 UTC [57] LOG: redo starts at 0/216DCD0
2020-11-04 12:53:53.712 UTC [57] LOG: invalid record length at 0/24F2310: wanted 24, got 0
2020-11-04 12:53:53.712 UTC [57] LOG: redo done at 0/24F22D8
2020-11-04 12:53:53.741 UTC [1] LOG: database system is ready to accept connections

そこで、

コンテナの外に出て、

sudo apt-get clean
sudo apt-get install postgis
sudo apt-get update

■全部のDockerを止める
C:\Users\ebata>docker ps -aq | xargs docker stop
C:\Users\ebata>docker ps -aq | xargs docker rm (これやると、これまでの設定も全滅するので注意)

もう一度、imageから作り直して ・・(30分経過)・・ううむ、それでもダメか。

今日はここで一旦引き上げ

2020/11,江端さんの技術メモ

正直手続忘れてしまったけど、一応historyからメモを作成しておきます。
https://docs.docker.com/engine/install/ubuntu/

$ sudo apt-get remove docker docker-engine docker.io containerd runc
$ sudo apt-get update
$ sudo apt-get install \
apt-transport-https \
ca-certificates \
curl \
gnupg-agent \
software-properties-common
$ curl -fsSL https://download.docker.com/linux/ubuntu/gpg | sudo apt-key add -
$ sudo apt-key fingerprint 0EBFCD88
$ sudo apt-get update
$ sudo apt-get install docker-ce docker-ce-cli containerd.io

ここからコケ始めました。

$ apt-cache madison docker-ce

の後、

$ sudo apt-get install docker-ce=<VERSION_STRING> docker-ce-cli=<VERSION_STRING> containerd.io

を入力したら、予想通り失敗しました。

(ちょっと一息)

$ apt-cache madison docker-ce

を入力した時、一番最初に表示された"5:19.03.13~3-0~ubuntu-focal" を訳も分からずに、置き換えしました。

$sudo apt-get install docker-ce=5:19.03.13~3-0~ubuntu-focal docker-ce-cli=5:19.03.13~3-0~ubuntu-focal containerd.io

でもって、

$ sudo docker run hello-world

をして、コメントに出てくる通りに、

$ docker run -it ubuntu bash

を実施しても"Got permission denied....." とか言われて、dockerのコンテナの中に入ることができませんでした。

$ docker ps

Got permission denied while trying to connect to the Docker daemon
socket at unix:///var/run/docker.sock:
Get http://%2Fvar%2Frun%2Fdocker.sock/v1.39/containers/json:
dial unix /var/run/docker.sock: connect: permission denied

てなエラーが出てくるので、このエラーメッセージで検索したところ、

# dockerグループへユーザを追加
$ sudo gpasswd -a ubuntu docker

# グループの追加ができたことを確認
$ id ubuntu

と入力して、(ここ大事)

# 一回ログアウトして再ログインする
$ exit

して、再度

$ sudo docker run hello-world
$ docker run -it ubuntu bash

をしたら、今度はコンテナの中に入ることができました。

ubuntu@ip-172-26-13-137:~$ docker run -it ubuntu bash
Unable to find image 'ubuntu:latest' locally
latest: Pulling from library/ubuntu
6a5697faee43: Pull complete
ba13d3bc422b: Pull complete
a254829d9e55: Pull complete
Digest: sha256:fff16eea1a8ae92867721d90c59a75652ea66d29c05294e6e2f898704bdb8cf1
Status: Downloaded newer image for ubuntu:latest
root@e9ff5fa891d0:/# ;s
bash: syntax error near unexpected token `;'
root@e9ff5fa891d0:/# ls
bin   dev  home  lib32  libx32  mnt  proc  run   srv  tmp  var
boot  etc  lib   lib64  media   opt  root  sbin  sys  usr

よく分からんけど、これで、Amazon Lightsailの中にDockerをインストールすることができたんだろう・・・と思っています。

2020/11,江端さんの技術メモ

イプシムのSIM(IPアドレス付きで、一番安いやつ)が、ラズパイに差さったままで使っていなかったので、iPadで使えるようにした。必要に応じて、またラズパイに戻せばいいし。

  1. SIM取り出し用の機具の準備

  2. イプシムのSIMカード情報の確認(画像は偽造しています)

  3. SIMカード番号の確認 (上記のICCIDと同じであるかを確認(画像は偽造しています))

3. iPadのスロットに挿入する

4. iPadから、https://ipsim.net/support.html にアクセスし、APN構成プロファイルをダウンロードする

これをダウンロードするのだが、これがインストールできているどうかが、確認できずに困った(インストールボタンが見あたらなかったから)。この場合は、「設定」で調べる。

ちなみに、以下の情報が必要なのかは分からないが一応セットしておいた。


5. iPadから、https://ipsim.net/support.html にアクセスし、APN構成プロファイルをダウンロードする(画像は偽造しています)

上記の赤い囲みに数字が出てくれば、インストールできている(と思う)。

7.右上にこの表示が出てくれば、SIMカードは稼動している(最初のうち、ブラウザが表示されなかったりするが時間が経過すると見えるようになる(ことがあるみたい)。表示されずに、なんども、手順をやりなおしていたが、"放置"が正解だったような気がする)

以上